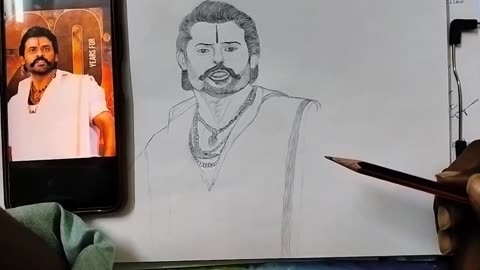
A Captivating Victory Venkatesh Pencil Portrait
Creating a pencil art drawing of Victory Venkatesh, or any portrait for that matter, involves several steps. Here's a basic guide to help you get started:
Materials Needed:
Reference Image: Find a clear and high-resolution image of Victory Venkatesh that you want to draw.
Pencils: Range of pencils (H, HB, B, 2B, 4B, 6B, etc.) for various shades.
Drawing Paper: Use a smooth, heavyweight paper to prevent tearing or warping.
Eraser: A kneaded eraser works well for shading and highlights.
Blending Tools: Tissue paper, blending stumps, or your fingers can be used for smooth blending.
Steps:
Select a Good Reference:
Choose a clear, high-resolution image that captures the features and expressions well.
Sketch the Outline:
Start with a light sketch of the basic facial features. Pay attention to the proportions and shapes. Use simple shapes and lines to map out the face.
Add Details:
Once you're satisfied with the basic sketch, start adding more details. Pay attention to the eyes, nose, mouth, and other facial features. Capture the unique characteristics of Victory Venkatesh.
Shading:
Begin shading from light to dark. Use lighter pencils (H or HB) for the initial shading and gradually move to darker pencils (B, 2B, etc.) for deeper shadows.
Observe the reference image carefully to understand the areas that are highlighted and the ones in shadow. Pay attention to the play of light and shadow on the face.
Blending:
Blend the shades using blending tools or your fingers to create a smooth transition between light and shadow. This helps eliminate harsh lines and gives a more realistic appearance.
Refine Details:
Go back and refine the details. Add more depth to the eyes, enhance facial expressions, and fine-tune the features.
Hair and Background:
Pay attention to hair details. Use a combination of light and dark strokes to capture the texture. Consider whether you want to include a background, and if so, add it carefully.
Final Touches:
Review your drawing and make any necessary adjustments. Add final touches, highlights, and shadows to bring out the three-dimensional aspect.
Protect Your Artwork:
Once you're satisfied with your drawing, consider using a fixative spray to protect the pencil work and prevent smudging.
1
view
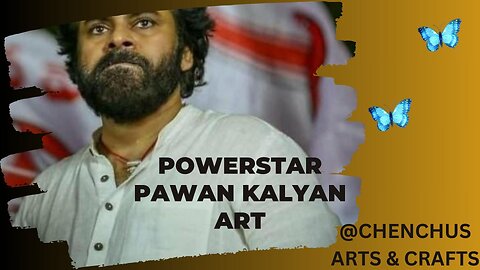
Power star pawan kalyan realistic pencil drawing art #pawanlkalyan #powerstar #artsandcrafts
Creating a pencil art drawing of Powerstar Pawan Kalyan or any other person involves a series of steps. Here's a general guide to help you get started:
Materials Needed:
Drawing paper or sketchbook
Pencils (ranging from 2H to 8B for different shades)
Eraser
Blending stumps or cotton swabs for shading
Reference image of Pawan Kalyan
Step-by-Step Guide:
Choose a Reference Image:
Find a high-quality image of Pawan Kalyan that you want to draw. Make sure the image is clear and has good lighting to help capture details.
Outline the Basic Shapes:
Start by lightly sketching the basic shapes and proportions of the face. This includes the head shape, eyes, nose, and mouth. Pay attention to the placement of facial features.
Define Facial Features:
Refine the facial features by adding more details. Pay close attention to the eyes, eyebrows, nose, mouth, and ears. Take your time to capture the likeness of Pawan Kalyan.
Add Shading:
Begin shading the different areas of the face. Use a range of pencils to create different tones. Start with lighter shading and gradually build up to darker tones. Observe the reference image to understand where shadows fall.
Focus on Details:
Pay attention to details like wrinkles, facial hair, and any distinctive features. Use a sharp pencil for fine lines and details. Take your time to ensure accuracy.
Hair and Background:
Move on to drawing the hair. Pay attention to the direction of the hair strands and use shading to create depth. Consider the background as well; you can choose to leave it blank or add a simple background that complements the subject.
Refine and Adjust:
Step back and look at your drawing from a distance. This will help you identify areas that may need adjustment or refinement. Make any necessary changes to improve the overall likeness.
Final Touches:
Once you're satisfied with the drawing, make any final touches. Clean up any smudges, refine details, and ensure that the shading is consistent throughout the drawing.
Sign Your Art:
Sign your artwork in a corner with a small, neat signature.
Remember, practice is key, and each drawing is a learning experience. Don't be afraid to make mistakes, and feel free to experiment with different techniques. Happy drawing!
.
.
#PawanKalyan #PencilDrawing #PortraitArt #FanArt #Powerstar #ArtisticTribute #CelebritySketch #RealismDrawing #FineArt #ArtInspiration #PortraitSketch #PencilPortrait #DrawingTutorial #ArtisticProcess #ArtTips #ArtistsOnSocialMedia #ArtisticExpression #Sketchbook #CreativeJourney #ArtCommunity #PencilArtistry #ArtistsOfInstagram #CelebArt #ArtistsWorldwide #ArtisticSkills #ArtisticCreation #LearnToDraw #StepByStepDrawing #PortraitChallenge
7
views
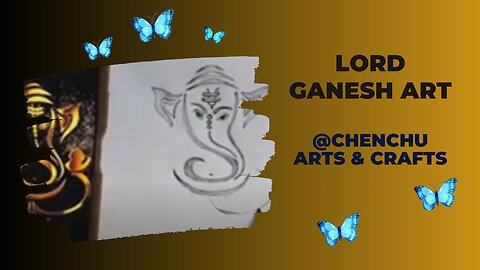
HOW TO DRAW GANAPATHI ART 🎨
Creating Lord Ganesha (Ganapathi) art can be a wonderful and creative process. Here's a step-by-step guide to help you draw Lord Ganesha:
Materials you'll need:
Sketch paper or drawing pad
Pencils (2B, 4B, or 6B for darker lines)
Eraser
Fine-tipped pens or markers (optional for outlining)
Colored pencils, watercolors, or markers (optional for coloring)
Step 1: Reference Image
Find a reference image of Lord Ganesha to guide your drawing. This can be a traditional depiction or a more modern interpretation.
Step 2: Basic Shapes
Start by sketching the basic shapes. Ganesha is often depicted with a large, rounded body and a big head. Draw a large oval for the body and a smaller circle for the head. Add guidelines to help position the facial features.
Step 3: Facial Features
Add Ganesha's facial features. Draw large ears, a trunk curving to the left, and a small mouth. Give him expressive eyes. Add the distinctive Ganesha crown or headgear.
Step 4: Limbs and Posture
Draw Ganesha's four arms. In each hand, you can include symbolic objects like a conch shell, a lotus flower, an axe, or a bowl of sweets. Experiment with different poses for the arms. Consider drawing Ganesha sitting on a lotus or any other relevant base.
Step 5: Details
Add intricate details like jewelry, clothing, and other accessories. Pay attention to the details on Ganesha's crown, necklaces, and clothing. Don't forget the sacred thread across the chest.
Step 6: Outline
Once you are satisfied with your sketch, go over the lines with a darker pencil or fine-tipped pen. This will define the details and give your drawing a clean, finished look.
Step 7: Coloring (Optional)
If you want to add color, use colored pencils, watercolors, or markers. Traditional colors for Lord Ganesha are often red, yellow, and green, but feel free to use your artistic interpretation.
Step 8: Background (Optional)
Consider adding a background to enhance the overall composition. You can keep it simple or incorporate elements like flowers, clouds, or a temple.
Step 9: Final Touches
Add any final touches or details to complete your drawing. Take your time to ensure that all the elements are well-defined and proportionate.
Remember, art is a form of expression, so feel free to add your own unique style and creativity to your Lord Ganesha drawing. Enjoy the process, and don't be afraid to experiment!
.
.
#LordGanesha
#GanapathiArt
#DrawingTutorial
#ArtisticProcess
#SketchingGuide
#CreativeExpression
#ArtInspiration
#StepByStepDrawing
#TraditionalArt
#HinduDeityArt
#GaneshaDrawing
#ArtMaterials
#ArtForBeginners
#CulturalArt
#ColoringTechniques
#ArtisticDetails
#SpiritualArt
#CulturalHeritage
#ArtisticCraft
#ExpressiveArt
15
views
3
comments
Yashora's Creative Canvas Artistic Adventures in Arts and Crafts
Explore the boundless world of creativity with actor Yashora in "Yashora's Creative Canvas: Artistic Adventures in Arts and Crafts." 🎨✨ Immerse yourself in a captivating journey as Yashora showcases a diverse range of artistic talents, sharing unique and inspiring arts and crafts projects. From DIY masterpieces to innovative crafting ideas, this series promises to ignite your creative spark! 🔥🖌️ #Yashora #ArtsAndCrafts #CreativeCanvas #DIYProjects #CraftingIdeas #ArtisticAdventures #InnovationInCrafts #CreativeExpression #YashoraCreates #CraftyActor #InspirationInArt
8
views