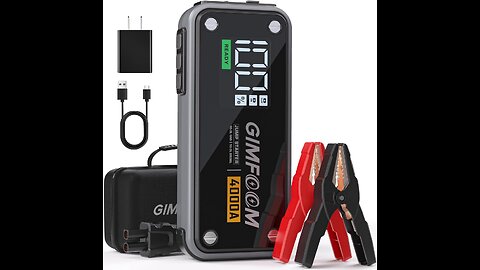
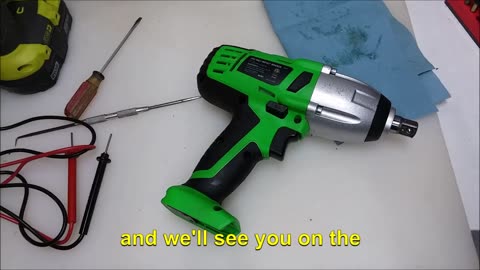
Jump Starter, 4000A Car Battery Jump Starter with Wall Charger (10L Gas & 10L Diesel Engines) Review
In this video we review the 4000 Amp Jump starter by GIMFOOM
https://amzn.to/3w7P900
@Fliki
4
views
1
comment
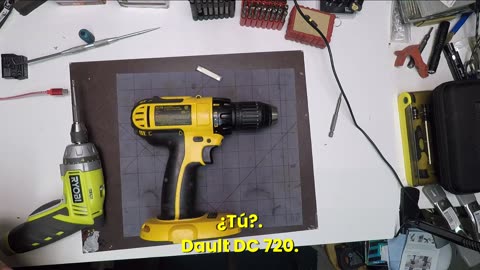
Reparación del taladro DeWalt DC720: Tutorial completo de desmontaje y reensamblaje
¿Tu fiel taladro DeWalt DC720 está acumulando polvo debido a un misterioso mal funcionamiento? ¡No te desesperes ni saques la cartera todavía! Con esta completa guía en video, puedes convertirte en tu propio doctor de taladros y darle vida nuevamente a tu querida herramienta.
¿No tienes experiencia en reparaciones? ¡No hay problema! Este tutorial paso a paso, completo con imágenes claras e instrucciones detalladas, desglosa el desmontaje y reensamblaje completo de tu DC720, haciéndolo accesible a aficionados al bricolaje de todos los niveles.
En este video, descubrirás:
Las herramientas esenciales que necesitarás para el trabajo.
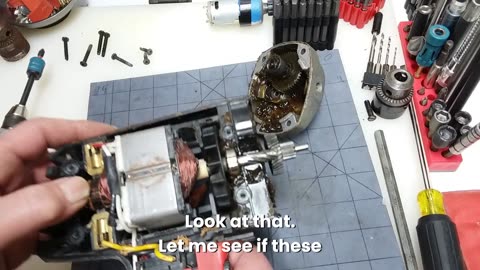
Un desglose meticuloso de cada paso, desde la extracción de la batería hasta el desmontaje de los componentes internos.
Planos cercanos y consejos de expertos para ayudarte a navegar incluso por las partes más complicadas.
Problemas comunes de reparación asociados con el DC720 y cómo abordarlos.
La satisfactoria alegría de arreglar tu taladro tú mismo y ahorrar dinero en reparaciones costosas.
¡Pero espera, hay más! Este video no se trata solo de arreglar tu taladro; se trata de empoderarte con conocimientos valiosos. Al seguirlo, obtendrás una comprensión más profunda de cómo funciona tu taladro, lo que te equipará mejor para el mantenimiento y las reparaciones futuras.
Ya seas un aficionado al bricolaje experimentado o un completo principiante, este video es tu guía definitiva para conquistar el desmontaje y reensamblaje del DeWalt DC720.
¡No lo esperes más! Coge tus herramientas, dale clic a reproducir y emprende tu viaje de resurrección del taladro hoy mismo.
5
views
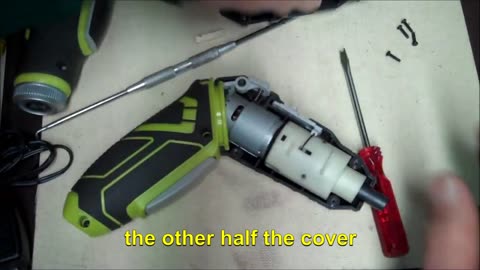
Taking Apart an Old Craftsman Drill and Cleaning and Greasing The Gears
In this video we take an old Craftsman Drill and take it apart for cleaning and greasing.
18
views
Installing a New Chuck
🔧Got a new Chuck on my drill and it’s made in the USA! Tightening it up but not too tight - I’ll show you how it all comes apart in my next video. #DIY #Tools #MadeInUSA #getmunch
12
views
Ridgid R86011 1/2" Impact Wrench R and R
Ridgid R86011 1/2" Impact Wrench takedown and reassemble.
9
views
Fix Ryobi HP44L Quickturn Cordless Lithium Ion Screwdriver Repair
Fix Ryobi HP44L Quickturn Cordless Lithium Ion Screwdriver Repair
7
views
Reemplazo de pantalla Fusion5 108 10.6 Parte 2
Reemplazo de pantalla Fusion5 108 10.6 Parte 2
5
views
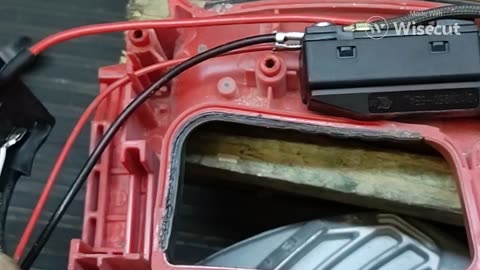
Fixing the Broken Solder on the Ryobi hp44l Power Screwdriver
Fixing the Broken Solder on the Ryobi hp44l Power Screwdriver
Made with Wisecut
https://wisecut.pxf.io/eKQOQD
3
views

How To Remove The Chuck From A Makita Cordless Drill
How To Remove The Chuck From A Makita Cordless Drill
Made with Wisecut
https://wisecut.pxf.io/eKQOQD
3
views
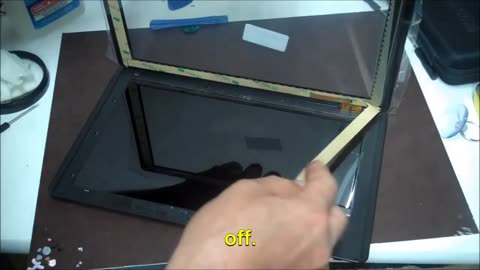

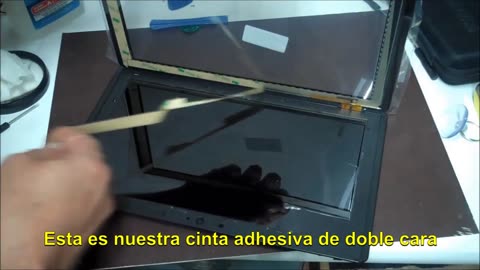
Fusion5 108 10.6" Screen Replacement Part 1
Fusion5 108 10.6" Screen Replacement Part 1
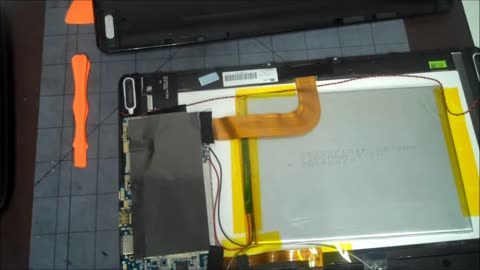
This is the first part of a video tutorial on how to replace the screen on a Fusion5 108 10.6" tablet. In this part, we will show you how to remove the back cover of the tablet and disconnect the battery.
Tools and materials needed:
Phillips head screwdriver
Spudger
Suction cup
Isopropyl alcohol
Microfiber cloth
New Fusion5 108 10.6" screen
Instructions:
Power off the tablet and remove the microSD card and SIM card (if applicable).
Use a Phillips head screwdriver to remove the two screws at the bottom of the tablet.
Use a spudger to pry open the back cover of the tablet.
Locate the battery connector and disconnect it using the spudger.
Be careful not to damage the battery or any other internal components.
Once the battery is disconnected, you can safely remove the back cover of the tablet.
In the next part of this video tutorial, we will show you how to remove the old screen and install the new screen.
Please note: This video tutorial is for informational purposes only. If you are not comfortable repairing your tablet yourself, please take it to a qualified technician.
9
views
Reemplazo de pantalla Fusion5 108 10.6" Parte 1
Reemplazo de pantalla Fusion5 108 10.6" Parte 1
Esta es la primera parte de un video tutorial sobre cómo reemplazar la pantalla de una tableta Fusion5 108 10.6". En esta parte, le mostraremos cómo quitar la cubierta posterior de la tableta y desconectar la batería.
Herramientas y materiales necesarios:
Destornillador Phillips
Spudger
Ventosa
Alcohol isopropílico
Paño de microfibra
Pantalla nueva Fusion5 108 10.6"
Instrucciones:
Apague la tableta y retire la tarjeta microSD y la tarjeta SIM (si corresponde).
Utilice un destornillador Phillips para quitar los dos tornillos de la parte inferior de la tableta.
Utilice un spudger para abrir la cubierta posterior de la tableta.
Localice el conector de la batería y desconéctelo con el spudger.
Tenga cuidado de no dañar la batería ni ningún otro componente interno.
Una vez que la batería esté desconectada, puede quitar la cubierta posterior de la tableta de forma segura.
En la siguiente parte de este video tutorial, le mostraremos cómo quitar la pantalla vieja e instalar la nueva.
Tenga en cuenta: Este video tutorial es solo para fines informativos. Si no se siente cómodo reparando su tableta usted mismo, llévela a un técnico calificado.
5
views
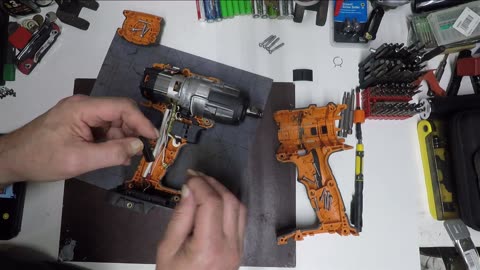
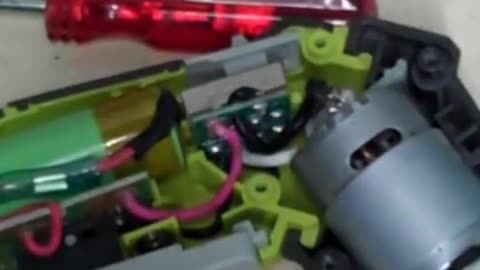
OEM Tools Impact Driver Breakdown: Inside Look at This Popular Cordless Tool
Take a closer look at the OEM Tools impact driver, one of the most popular cordless tools on the market. This breakdown will cover everything from the motor and gears to the impact mechanism and battery. Learn how this tool works and what makes it so effective at loosening and tightening fasteners.
4
views

How to Install a Hover Lamp Shade (Even If You're a Klutz Like Me!) - Bloopers Included
How to Install a Hover Lamp Shade (Even If You're a Klutz Like Me!) - Bloopers Included
Learn how to install the hover shade on the Amazing Hover Lamp, even if you're not the most coordinated person in the world. I'll walk you through the steps step-by-step, and I'll even share some of my own bloopers along the way. So don't worry, you're not alone!
3
views
Dewalt DCF887 Impact Driver Breakdown and Replace The Anvil
In this video, I will show you how to breakdown and replace the anvil on a Dewalt DCF887 impact driver. The anvil is the part of the impact driver that receives the impact from the hammer and transfers it to the bit. If the anvil is damaged, it can cause the impact driver to malfunction.
The tools and materials you will need for this repair are:
T10 Torx screwdriver
T20 Torx screwdriver
Grease
Small Pick
4
views
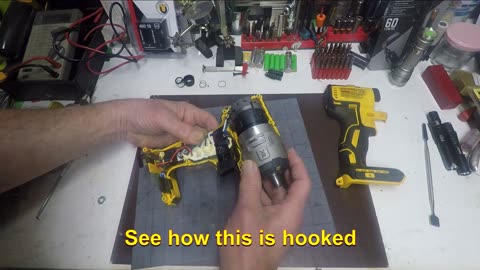
Desmontaje del Dewalt DCF887 Impact Driver y reemplazo del yunque
En este video, te mostraré cómo desmontar y reemplazar el yunque en un destornillador de impacto Dewalt DCF887. El yunque es la parte del destornillador de impacto que recibe el impacto del martillo y lo transfiere a la broca. Si el yunque está dañado, puede hacer que el destornillador de impacto no funcione correctamente.
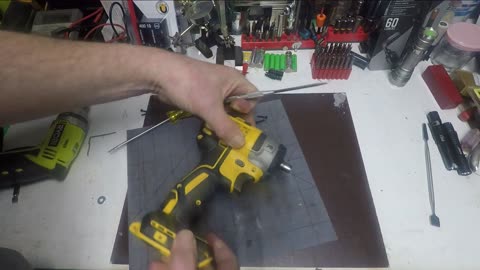
Las herramientas y materiales que necesitarás para esta reparación son:
Un destornillador Torx T10 un T20
Un yunque de repuesto
Aquí están los pasos involucrados en la reparación:
Retire la batería del destornillador de impacto.
Use el destornillador Phillips para quitar los tornillos que sujetan la tapa lateral en su lugar.
Retire la tapa lateral.
Use el destornillador Torx para quitar los tornillos que sujetan el yunque en su lugar.
Retire el yunque.
Instale el nuevo yunque.
Vuelva a colocar la tapa lateral y los tornillos.
Vuelva a instalar la batería.
La reparación debe tomar unos 15 minutos en completarse.
Aquí hay algunos consejos adicionales para esta reparación:
Tenga cuidado de no perder ninguno de los tornillos pequeños.
Asegúrese de que el nuevo yunque esté correctamente alineado antes de apretar los tornillos.
Si no se siente cómodo realizando esta reparación usted mismo, puede llevar su destornillador de impacto a un técnico calificado.
Espero que este video te ayude a reparar tu destornillador de impacto Dewalt DCF887. ¡Gracias por ver!
20
views
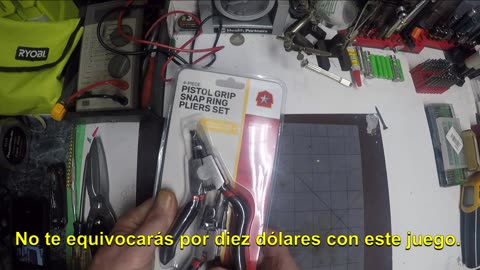
Juego de alicates de anillo de presión de 4 piezas de Tractor Supply: Unboxing y revisión
En este video, desempaquetamos y revisamos el juego de alicates de anillo de presión de 4 piezas de Tractor Supply. Este juego incluye dos pares de alicates de anillo de presión: uno para anillos de presión internos y otro para anillos de presión externos. Los alicates de anillo de presión son una herramienta esencial para cualquier mecánico o bricolaje, ya que se utilizan para instalar y quitar anillos de presión de una variedad de aplicaciones, como equipos automotrices, industriales y agrícolas.
Abordamos las características de cada par de alicates de anillo de presión en detalle, y también mostramos cómo usarlos para instalar y quitar anillos de presión. También probamos la durabilidad de los alicates usándolos para instalar y quitar anillos de presión de una variedad de diferentes materiales.
En general, estamos impresionados con el juego de alicates de anillo de presión de 4 piezas de Tractor Supply. Los alicates están bien hechos y son duraderos, y son fáciles de usar. Recomendaríamos este juego a cualquier mecánico o bricolaje que necesite un juego confiable de alicates de anillo de presión.
Palabras clave:
alicates de anillo de presión, Tractor Supply, desempaquetado, revisión, instalación, extracción, durabilidad, mecánico, bricolaje, automotriz, industrial, agrícola
https://amzn.to/3R9qeBm
As an Amazon associate I may earn a commission if you use my link.
6
views
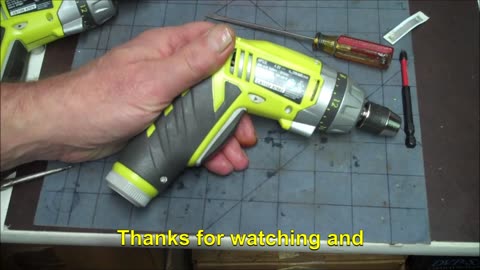
Ryobi HP53l Breakdown and Reassembly
Ryobi HP53l Power Screwdriver Breakdown and Reassembly
In this video, we will take apart and reassemble a Ryobi HP53l power screwdriver. This is a common power screwdriver that is used for a variety of tasks, such as assembling furniture, hanging pictures, and fixing small repairs around the house.
We will show you how to safely disassemble the screwdriver, identify the different components, and clean and inspect them. We will also show you how to reassemble the screwdriver correctly, so that it operates safely and effectively.
The video covers all of the steps involved in breaking down and reassembling the screwdriver, including:
Removing the screws that hold the screwdriver together
Separating the different components of the screwdriver
Cleaning and inspecting the components
Lubricating the components
Reassembling the screwdriver in the correct order.
This video is a valuable resource for anyone who owns a Ryobi HP53l power screwdriver or who is interested in learning how to disassemble and reassemble power tools.
Safety Guidelines:
Always disconnect the power screwdriver from the power source before disassembling it.
Be careful not to lose any small parts.
Use the correct tools for the job.
Assemble the screwdriver carefully, following the instructions in the video.
Audience:
Ryobi HP53l power screwdriver owners
People who are interested in learning how to disassemble and reassemble power tools
16
views
How to Fix a Milwaukee M18 Cordless Lithium-Ion 6-1/2" Circular Saw - 2630-20
How to Fix the Electronics in a Milwaukee 6 1/2" Cordless Circular Saw (Model 2630-20)
This video will show you how to fix the electronics in a Milwaukee 6 1/2" cordless circular saw (model 2630-20). The saw may not be working if the electronics are damaged or corroded. This video will show you how to identify the problem and how to fix it.
Check it out here:
https://amzn.to/47RTNxm
The video will start by showing you how to disassemble the saw. Once the saw is disassembled, the video will show you how to inspect the electronics. The video will also show you how to replace any damaged or corroded components.
The video will conclude by showing you how to reassemble the saw.
Tools and materials needed:
Phillips head screwdriver
Small flathead screwdriver
New electronic components (if needed)
Safety precautions:
Always wear safety glasses when working on electrical equipment.
Be careful not to touch the exposed wires or components.
Disconnect the battery from the saw before you start working on it.
Steps:
Disassemble the saw.
Inspect the electronics.
Replace any damaged or corroded components.
Reassemble the saw.
Tips:
If you are not comfortable working on electrical equipment, take the saw to a qualified technician.
Follow the instructions that come with the new electronic components.
Check it out here:
https://amzn.to/47RTNxm
As an Amazon associate I may earn a commission from any links here to Amazon products.
17
views


Main House Drain Stack Pipe Repaired by Professionals - Know Your Limits
Main Drain Pipe Repaired by Professionals - Know Your Limits
There are several reasons why you should let the pros fix your main house drain stack pipe.
The main house drain stack pipe is a major part of your plumbing system. It is responsible for carrying wastewater from all the drains in your home to the sewer line. If there is a problem with this pipe, it can cause a major backup and flood your home.
Fixing a main house drain stack pipe is a complex job. It requires specialized skills and tools that most homeowners do not have. If you try to fix it yourself, you could make the problem worse.
A professional plumber will be able to fix the problem quickly and efficiently. They will also have the knowledge and experience to identify any other potential problems with your plumbing system.
A professional plumber will be insured. This means that if they damage your home while they are working, you will be covered.
Here are some of the signs that you may need to have your main house drain stack pipe repaired:
Slow draining drains
Gurgling noises coming from the drains
Foul odors coming from the drains
Water backing up into the drains
Visible cracks or leaks in the pipe
If you notice any of these signs, it is important to call a professional plumber right away. Do not attempt to fix the problem yourself, as you could make it worse.
Here are some of the things that a plumber will do to fix your main house drain stack pipe:
They will inspect the pipe to determine the extent of the damage.
They may need to snake the pipe to clear any clogs.
They may need to replace the entire pipe.
They will clean and disinfect the pipe to prevent future problems.
The cost of repairing a main house drain stack pipe will vary depending on the extent of the damage. However, it is important to remember that fixing the problem now is much cheaper than having to deal with a major backup or flood later.
42
views
How to fix stick drift on a ps4 controller
Stick drift is a common problem with PS4 controllers. It occurs when the analog stick moves on its own, even when you're not touching it. This can make it difficult to control your character or the game in general.
There are a few things you can do to fix stick drift on a PS4 controller:
Reset the controller. This can often fix minor cases of stick drift. To do this, turn off the controller and then hold down the reset button for 5 seconds. The reset button is a small hole on the back of the controller, next to the L2 button.
Clean the analog sticks. Dust and dirt can build up inside the analog sticks and cause them to drift. To clean them, use a cotton swab dipped in rubbing alcohol. Gently swab around the base of the analog sticks. You can also use compressed air to blow out any dust or debris.
Open the controller and clean the sensor. If cleaning the analog sticks doesn't work, you may need to open the controller and clean the sensor. This is a more complicated process, so you may want to take your controller to a professional if you're not comfortable doing it yourself.
Replace the analog sticks. If the sensor is damaged, you may need to replace the analog sticks. This is the most difficult option, but it's also the most likely to fix the problem.
If you've tried all of these things and your controller is still drifting, you may need to buy a new one.
Here are some additional tips to prevent stick drift:
Be careful not to drop or jostle your controller.
Don't eat or drink while you're playing games.
Clean your controller regularly.
Avoid using third-party controllers.
I hope this helps!
35
views

How to Delete Facebook Account on iPhone
How to Delete your Facebook Account on iPhone
Here are some things to keep in mind before deleting your Facebook account:
You will lose access to all of your Facebook data, including posts, photos, videos, messages, and friends.
If you have any apps that are connected to your Facebook account, you will need to disconnect them before deleting your account.
If you are using Facebook to log in to other websites or apps, you will need to change your login credentials for those websites or apps.
If you are not sure whether you want to permanently delete your Facebook account, you can temporarily deactivate it instead. To do this, follow the same steps as above, but tap Deactivate Account instead of Delete Account. Your account will be deactivated immediately, and you can reactivate it at any time by logging back in.
Here are the steps on how to delete your Facebook account on your iPhone:
Open the Facebook app on your iPhone.
Tap the three-lined icon (hamburger menu) in the bottom right corner.
Tap Settings & Privacy.
Tap Settings.
Tap Account Ownership and Control.
Tap Deactivation and Deletion.
Tap Delete Account.
Tap Continue.
Enter your password and tap Continue.
Review the information about deleting your account and tap Delete Account.
Your account will be deleted after 30 days. During this time, you can still reactivate your account if you change your mind.
22
views
1
comment

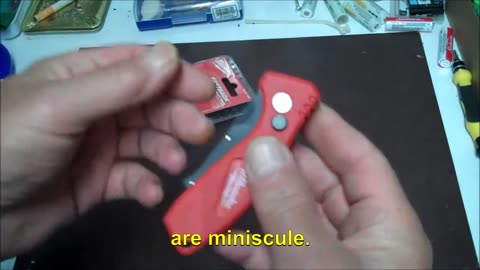
Datashark Cable and Satellite Tool Kit
In this video, we'll take a look at the Datashark Cable and Satellite Tool Kit. This kit is perfect for anyone who needs to make their own cable connections for TV, satellite, or internet.
Here's a link to the kit on Amazon
http://amzn.to/2hOPMTt
It comes with everything you need, including a cable cutter, coax stripper, compression crimper, and 10 RG6 connectors.
We'll show you how to use each tool in the kit to make a weatherproof cable connection. We'll also give you some tips for troubleshooting common cable problems. By the end of this video, you'll be able to make your own cable connections like a pro!
Here are some of the features of the Datashark Cable and Satellite Tool Kit:
Includes all the tools you need to make your own cable connections
Easy to use and affordable
Makes weatherproof connections
Perfect for TV, satellite, and internet
If you're looking for a reliable and easy-to-use cable tool kit, the Datashark Cable and Satellite Tool Kit is a great option. Check it out today!
Here are some additional things you could mention in the video:
The kit is made from durable materials and is designed to last.
It is compact and easy to store.
The tools are color-coded for easy identification.
The kit comes with a carrying case for easy transport.
Made with pictory
https://bit.ly/trypictoryai Use Promo code 'steven46' for a special discount.
14
views