chhole maslae indian style recipe
Home » Recipes » Indian Main Course Vegetarian Recipes
Punjabi Chole – Chickpeas Curry
Posted on March 21, 2014 by Manali
EFGF
Chickpeas Indian curry where chickpeas are cooked with lots and lots of spices. Goes well with naan, roti or plain rice.
Jump to Recipe
Punjabi-Chole-Masala-notitle-cwm
Punjabi chole masala or chana masala is one of the most popular curry dishes from India. In fact in north India no wedding or party is complete until you have chole masala on the menu. I remember whenever we would call someone over for lunch or dinner, mom would almost always make chole.
So what actually is chole masala? In this recipe, chickpeas are cooked with onions, tomatoes and lots of spices. A special blend of spices called “chole powder/masala” is easily available at every Indian store. One can make chole masala powder at home too by dry roasting ingredients like cumin, cloves, coriander, peppercorn, cardamom etc. But I usually get the masala from the store, saves me time and also tastes good.
punjabi-chole-masala-1-notitle-cwm
My husband loves chole, well that’s given since he is a punjabi. So after I got married I really tried to master making punjabi chole and after lots of trials and errors, I think I have now found the perfect recipe. Hubby feels that I make the best chole, maybe he’s just biased but at least that make me pretty confident about this recipe ; -)
chole-recipe-notitle-cwm
You will notice that I added 2 tea bags while cooking chickpeas in the pressure cooker, that’s because the tea bags help in giving chole a dark brown/black color. I added only 2, but for a deeper darker brown color, you can add more tea bags. And before you start wondering, let me assure you that the tea bags do not hamper the taste of chickpeas in any way.
Serves: 5-6
Ingredients
To pressure cook
Chickpeas/Chole: 2 cups + 2 tbsp
Cardamom: 5-6
Black peppercorn: 4-5
Bay leaves: 2
Cinnamon sticks: 2
Tea bags: 2
Salt: to taste
Water: 5 cups
For the chole
Onion: 3/4 cup, grated or pureed [from 2 small onions]
Tomatoes: 2.5 cups puree [from 4 medium tomatoes]
Cloves: 3-4
Ginger-garlic paste: 2 teaspoon
Chole Masala: 3 teaspoon
Cumin powder: 3/4 teaspoon
Paprika powder: 1/2 teaspoon
Red chili powder: 1/2 teaspoon or to taste
Salt: to taste
To garnish
Ghee [clarified butter]: 1 tablespoon
Ginger: 1 inch, cut into julienne
Dried fenugreek leaves [kasuri methi]: 1/2 tbsp, crushed
Coriander leaves: 2 tablespoon, chopped
Garam masala: 1/4 teaspoon
Method
Soak the chickpeas overnight in enough water to cover them. I soaked a little more than 2 cups and in the morning I had around 5.5 cups of it! Drain the water in which you had soaked the chickpeas.
1. In a pressure cooker add the soaked and drained chickpeas, around 5 cups water, 2 tea bags, bay leaves, cardamom, cinnamon stick and some salt. Pressure cook at high flame till you get 1-2 whistles. After that lower the flame to medium and let the chickpeas cook for another 10-12 minutes. Remove the cooker from heat and allow it to cool down. Once the steam is gone, open the cooker and check the chickpeas. You should be able to press them easily with your fingers. If not, close the cooker and cook for 2 more whistles.
Here, you can also remove the bay leaves, cinnamon stick etc. from the chickpeas if you don’t want them in the curry.
2. In a wok, heat 2 tsp of oil. Once hot, add cloves and grated onions. Fry the onions till the raw smell goes away and they are light golden brown in color.
3. Add ginger-garlic paste and cook for 3-4 minutes till the smell of ginger-garlic goes away.
Chole-Recipe-Steps-1-notitle-cwm4. Now add the tomato puree , stir and let it cook for 12-15 minutes on medium-low flame. Cover the pan to prevent splash all around. This step in my opinion is very important. The tomatoes need to be cooked really well till the raw smell goes away completely. So have patience and let them cook for around 15 minutes.
5. Add the chole masala, red chilli powder, paprika powder, cumin powder, salt and mix for a 1-2 minutes.
6. Drain the the chickpeas and add them to the tomato-onion mixture, stir till all the chickpeas are coated with spices, around 2 minutes. Do not throw away the water once you have drained the chickpeas. We will add the same water in the gravy.
Chole-Recipe-Step-2--notitle-cwm
7. Add water, cover the pan and let it simmer at medium-low flame for around 30 minutes. The gravy will thicken after 30 minutes so add water accordingly. I do not like thin gravy with chole but if you do add more water than what is mentioned in the recipe.
After 30 minutes the gravy, chickpeas and all the spices would have mixed well together. We can now do the tempering.
8. To temper, heat 1 tbsp of ghee in a pan and the ginger julienne to it.
9. Fry till the juliennes are golden brown in color but do not burn them. Add to the chole curry, mix and switch off the flame.
Chole-Recipe-Step-3-notitle-cwmSprinkle some garam masala, kasuri methi and garnish with chopped coriander leaves.
Serve with roti, paratha or plain rice. Chole-chawal (chole & plain rice) is a very popular combination in North India.
85
views
1
comment
How to make coconut chutney indian recipe || how to make coconut recipe
How to make coconut chutney indian recipe
How to make coconut recipe
how to make coconut chutney recipe
What is Coconut Chutney
Chutneys are a class of condiments that originated in India and can be made from a multitude of different ingredients. Just on this site, I have recipes for tomato, coriander, peanut, tamarind and onion chutneys, and that isn’t even my full list! All of these delicious savory sauces and relishes are used to enhance the flavors of various meals.
Coconut chutney originated from the South Indian cuisine. It is most often served with breakfast or snack dishes. In its simplest form, it is made by finely grinding fresh white coconut meat with either green chilies or dry red chilies and salt added to it.
Chilies lend a bit of heat and spice in the chutney. Garlic or ginger can be added for more savory depth. A tempering of oil with crackled mustard seeds, fried urad dal (black gram), crisp curry leaves and asafoetida (hing) brings more flavor to otherwise plain coconut chutney.
Why This Recipe Works
I have been making this easy-peasy basic coconut chutney recipe for decades now, and it is still a favorite in our house. As someone who cooks very often, the fact that this coconut chutney makes regular appearances on our table should indicate just how delicious it is!
Made in the Tamil Nadu style, this particular recipe calls for roasted chana dal to be added. Also known as chana daria, these husked and split black chickpeas have a lovely rich and nutty taste.
While roasted chana dal are readily available for purchase in India, I know that they are not available everywhere. You can either opt to fry these lentils on your own at home, or simply skip it. Don’t worry, the coconut chutney will still be delicious without it.
If fresh coconut is not available to you, simply swap in frozen coconut or unsweetened dessicated coconut flakes instead. This easy recipe will work with whatever you have on hand.
You can also adjust the basic recipe by adding different ingredients. For example, if you add some roasted sesame seeds, dry red chilles and a touch of tamarind, it makes a lovely sauce for serving with steamed rice!
One of my favorite things about coconut chutney is how versatile it is! Apart from serving with breakfast foods like idli, dosa and vada, you can also serve it with tons of South Indian snacks.
We like to put it on Upma, Mysore Bonda, Onion Pakoda, Semiya Upma, Pongal and so many other dishes. I have a feeling that once you try it, coconut chutney will become one of your favorite condiments, too. When paired with Idli Sambar, it is even more enticing.
My mom-in-law who is Punjabi absolutely LOVES South Indian food, and this coconut chutney is one of her favorites. If you, like her, love anything with coconut, then you’re sure to love this traditional coconut sauce.
Step-by-Step Guide
How to make Coconut Chutney
Grinding Ingredients
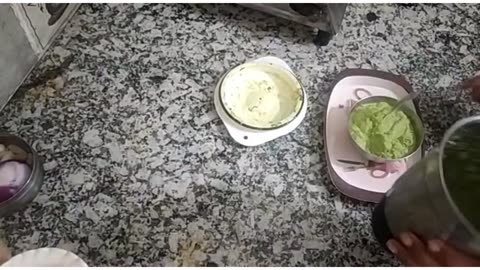
1. Add ½ cup tightly packed freshly grated coconut in a chutney grinder jar or a small grinder jar.
coconut added to chutney grinder bowl
2. Add 1 to 2 chopped green chillies (depending on your heat preference), ½ inch chopped ginger (optional, can substitute with 2 small cloves of garlic) and 2 tablespoons roasted chana dal.
NOTE: 1 green chili will yield about ½ to 1 teaspoon of chopped chillies. I have used about ½ teaspoon of chopped green chillies. For a spicy coconut chutney, depending on the pungency of the chilies, consider to add 2 to 3 green chilies.
TIP: You can swap the Indian variety of green chillies with ½ teaspoon of Serrano or Anaheim peppers. If using Thai green chillies, add about ¼ teaspoon chopped as they are very spicy.
green chiles, ginger and roasted chana dal added to grinder bowl
3. Add salt to taste. I suggest starting with less salt at first. Then, after grinding, check the taste and add some more salt if required. Remember, you can always add MORE salt, but you can’t take it away once it has been added.
salt added to grinder bowl
4. Add 3 to 4 tablespoons water. You can make this coconut chutney thicker by adding less water. You can skip roasted chana dal if you do not have it.
NOTE: Roasted chana dal is different from raw chana dal. Roasted chana dal is crunchy and directly edible, unlike raw chana dal.
water added to grinder bowl for making coconut chutney recipe
5. Grind to a smooth consistency. If the blade is unable to grind or the chutney looks thick, then you can add 1 to 2 tablespoons more water or as needed.
coconut chutney base after grinding
6. Remove the chutney with a spoon or spatula in a heat proof bowl (e.g. steel, pyrex or glass). Check the taste and add more salt if needed.
base of coconut chutney in a white bowl on a black background
Tempering Coconut Chutney
7. In a small pan or a tadka pan, heat ½ tablespoon sesame oil (gingelly oil – made from raw sesame seeds) over low heat.
NOTE: You can also use sunflower oil, peanut oil, coconut oil or any neutral flavored oil.
oil in a tadka pan
8. Add ½ teaspoon mustard seeds and let them begin to crackle.
tempering mustard seeds
9. Once the mustard seeds begin to crackle, add ½ teaspoon urad dal (split and husked black gram).
NOTE: If you don’t have urad dal then feel free to skip in the recipe.
urad dal added to tempering oil
10. Next add ½ teaspoon cumin seeds. You can skip cumin seeds if you prefer.
cumin seeds added to tempering oil
10. Stir often and fry keeping the flame to a low.
tempering spices for making coconut chutney recipe
11. The urad dal should start becoming golden. The cumin seeds will also crackle and get browned.
showing the tempered spices changing color
12. Once the urad dal begins to turn to a golden color, then add 1 dry red chilli (broken and seeds removed), 9 to 10 curry leaves and a pinch of asafoetida (hing). If the pan becomes very hot, then switch off the flame after adding the red chili, curry leaves and asafoetida.
Be careful as after adding the curry leaves the oil splutters.
NOTE: If you are gluten free, please be sure to check that your asafoetida is gluten free as many commercially available varieties are processed with wheat products.
curry leaves, asafoetida and dried red pepper added to tadka pan
13. Stir and fry for a couple of seconds till the curry leaves become crisp and the red chilli changes color.
showing the crisped curry leaves and fried red chili in the tadka pan for making tamil nadu style coconut chutney recipe
14. Switch off the flame and immediately pour the entire tempering together with the oil on the ground coconut chutney in the bowl.
tempered spices and oil poured into white bowl with coconut chutney base
15. Mix very well.
spoon stirring spices into chutney
16. Serve coconut chutney with idli, dosa, vada, pongal or pakoda of your choice.
small white bowl of coconut chutney on a red plate with two dosas
About Hotel Style Coconut Chutney
This is my quick coconut chutney recipe that also goes extremely well with idli, dosa, uttapam and medu vada. This vegan chutney also goes well with upma.
easy hotel style coconut chutney, served in a white bowl
What contributes majorly to the earthy taste of this chutney is a good amount of roasted chana dal.
Here there is no tempering done but there is a bit of prep work which does not take much time. The curry leaves are fried and they get fried quickly releasing their fragrant flavors in the oil.
Thats what you need to do and then grind everything and the coconut chutney is ready to be served with dosa or idli or vada.
collage of hotel style coconut chutney recipe served in a bowl with dosa and roasted chana dal in a bowl
This coconut chutney recipe can be made with frozen or fresh coconut. To avoid grating coconut at the last minute, I usually grate the whole coconut and then freeze it.
When I want, I just take some of the frozen coconut and my work is easy whether it is making chutneys, sambar or vegetable stir-fries.
Step-by-Step Guide
How to make Hotel Style Coconut Chutney
Ingredients
½ cup grated fresh or frozen coconut
¼ cup roasted chana dal (roasted bengal gram)
½ inch ginger – chopped
1 to 2 green chilies – chopped
15 to 20 curry leaves
2 teaspoons oil (coconut oil or sunflower oil)
salt as required
¼ cup water or add as required
1. First heat 2 teaspoons oil (sunflower or coconut oil) in a frying pan. Keep the heat to a low. Then add 15 to 20 curry leaves.
Fry them stirring often till they become crisp and this takes just about 1 or 2 minutes. Remove the pan from the burner and set aside. Let this curry leaves and oil mixture cool.
sautéing curry leaves in a pan
2. Put all the ingredients (½ cup grated fresh or frozen coconut, ¼ cup roasted chana dal, ½ inch chopped ginger, 1 to 2 green chillies and salt (as required) along with the curry leaves and the oil mixture in a chutney grinder or small blender.
coconut chutney ingredients added in a blender
3. Add ¼ cup water or as required and grind to a smooth chutney. Do not add too much water. For a thicker consistency, add less water.
coconut chutney ground in a blender jar
4: Serve the Hotel Style Coconut Chutney with plain dosa or rava dosa or rava idli or uttapam. Consume when fresh. At the most you can freeze the chutney and use it for a couple of days.
In cold temperatures, the chutney will stay longer for a few hours in the refrigerator than in warmer or hotter climate.
125
views
1
comment
How to install in ubuntu 2023
How to Install Ubuntu on Desktop (Laptop or PC)
Choosing which Linux distribution to install can seem challenging as there are many versions to choose from, and each of them offers very different features. One popular distribution to consider is Ubuntu.
It is arguably one of the best Linux distributions available. It is simple to use, easily customizable, and scalable based on users’ needs.
This article will go over the two methods of installing Ubuntu with GUI on your PC or laptop. We will also include the requirements and all the needed configuration settings for installing Ubuntu.
Requirements for Installing Ubuntu on Desktop
How to Install Ubuntu Wiping Out the Old Operating System
1. Download Ubuntu OS From the Official Directory
2. Create a Bootable USB
3. Install Ubuntu OS From the USB
How to Install Ubuntu on Windows Using VirtualBox
1. Download and Install VirtualBox
2. Download and Install Linux ISO
How to Proceed With Ubuntu Installer
Requirements for Installing Ubuntu on Desktop
To install Ubuntu on a desktop, your computer has to meet these requirements:
2 GHz dual-core processor or better
At least 4 GB of RAM
25 GB of free disk space
USB port and a USB stick with at least 4GB capacity
Keep in mind that these installation methods work only with desktop computers and won’t suit VPS users as we are installing Ubuntu with a graphical interface. If you prefer a command-line interface, consider opting for a VPS solution instead.
How to Install Ubuntu Wiping Out the Old Operating System
Wiping out all the data from the hard drive is the cleanest way to install Ubuntu Desktop. This way, users delete old operating system files and install a fresh Ubuntu version.
Check out the comparison table below for the differences between applying this method and the virtual machine.
Ubuntu Linux on VM Ubuntu Linux on physical hardware
Scalability Can run multiple Ubuntu installations simultaneously Can run one Ubuntu installation
Support Hardware needs to support virtualization for VM to work properly Ubuntu will work on a broader range of hardware
Performance Performance is usually much slower and dictated by the host system Performance is typically much better because the operating system runs directly on the physical hardware
Development VMs allows the deployment of testing environments based on the user’s needs. This is extra useful for software development and testing Reconfiguring the operating system is a long and tedious task. Usually, it will include complete reinstallation of the operating system
To summarize, the VM Ubuntu installation will suit Ubuntu software testers better. In comparison, casual users will benefit more from installing Ubuntu on physical hardware due to its maximum performance and stability.
1. Download Ubuntu OS From the Official Directory
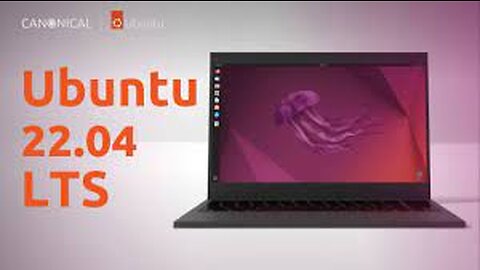
The first step to install Ubuntu natively is to download the official Ubuntu OS ISO file. For this tutorial, we will go with the newest Ubuntu 22.04 LTS desktop version.
Official download page for desktop Linux distribution – Ubuntu 22.04 LTS. Red border indicating the download button
Users can also choose between Ubuntu Server and other Ubuntu flavors. However, the main Ubuntu Desktop version has all the essential features a beginner needs.
2. Create a Bootable USB
After downloading the ISO file, you will need to create a bootable USB drive, which will be used to install Ubuntu. To do so, you will have to use third-party software, such as Rufus. We recommend downloading the portable version as it won’t require any installation and will be ready to use right away.
Official download page for Rufus 3.18 Portable. It is used to mount ISO files to USB devices
Just open the executable file, and Rufus will start. Once done, ensure that the USB drive is plugged in and select the Ubuntu ISO file.
Important! For the partition scheme, select GPT if you are using a newer computer. Otherwise, go with MBR.
Drive Properties section on the Rufus program
As for Format Options, leave the default file system and cluster size values and click on START.
Format Options section on the Rufus program
Important! Creating a bootable USB stick will wipe out all the data from the USB drive. Make sure to back it up before proceeding.
Give it around ten minutes, and the bootable USB drive will be ready.
3. Install Ubuntu OS From the USB
With the Ubuntu bootable drive ready, proceed with the installation. For that, restart your computer and access BIOS. Usually, BIOS can be reached by pressing the DEL or F2 keys on the keyboard whenever a similar screen shows up:
Default bios boot up screen for ASUS motherboard
Pro Tip
In case you missed the BIOS screen, restart your computer and try again.
Once in BIOS, look for the boot menu and set the order to make the USB drive the first one on the list. It should look like this:
Boot Priority settings for MSI BIOS
Now save and close BIOS. Give it a few minutes, and the Ubuntu installer should start. Once it begins, proceed to the next section about the Ubuntu installer.
How to Install Ubuntu on Windows Using VirtualBox
If you don’t want to wipe your hard drive completely, go with the VirtualBox installation method. This will install Ubuntu inside a virtual machine, making it completely independent of the primary system.
This method is excellent for those who want to test out different Linux distributions or install third-party software packages for Ubuntu.
Pro Tip
The virtual machine installation method allows you to install Ubuntu alongside other operating systems on the same computer.
1. Download and Install VirtualBox
Start by downloading the newest version of Oracle VirtualBox. Once done, open the executable file and proceed with the installation.
VirtualBox installation process
When asked about network interfaces, select Yes. Note that the internet connection might go down for a few minutes during the installation.
VirtualBox installer network interfaces warning
Next, proceed with the default installation settings.
2. Download and Install Linux ISO
After installing VirtualBox, open it by using the desktop shortcut and select New to create a new virtual machine.
Main VirtualBox window. The red border indicates the button to create a new virtual machine
Specify the virtual machine name and select the amount of RAM to be assigned. We recommend giving half the amount of the main system. For example, if the computer has 8 GB of RAM, assign 4 GB to the virtual machine.
There is also an option to specify a virtual hard disk since it’s a fresh installation – go with the default settings and click on Create.
VirtualBox window to specify the virtual machine name and memory size
Next up, choose the file location for the virtual machine, specify file size and click on Create. We will be keeping the default hard disk file type and dynamically allocated storage. Dynamic storage saves a lot of space because it grows as the data inside the virtual disk increases. On the other hand, fixed storage takes up the full amount right from the start.
VirtualBox window to specify hard drive size, type and storage
The virtual machine is now created. However, it will show an error message about no boot device. To fix it, select Settings, as you will need to assign the Ubuntu ISO file downloaded earlier.
Main VirtualBox window. The red border indicates the button to open the settings menu
Once in the settings, open the Storage section and assign the ISO file to the Controller: IDE.
VirtualBox window showing how to mount ISO file to DVD drive
The end result will look like this:
VirtualBox storage settings
Now, you can start the virtual machine without any issues.
Main VirtualBox window. The red border indicates the button to open the settings menu
Give it a few minutes, and the Ubuntu installer should start. Then, proceed to the next section about the Ubuntu installer.
How to Proceed With Ubuntu Installer
When the system boots to the new Ubuntu installation screen, select the Try or Install Ubuntu option.
The first step in the Ubuntu installation process. Try or Install Ubuntu button is selected
Select the installer language and choose the Install Ubuntu option in the next step. There is also an option to test Ubuntu. In that case, none of the hard drive files would get wiped. However, we are proceeding with the full installation.
Ubuntu installer step to choose the main language. The red border indicates the button to install Ubuntu
Choose the preferred keyboard layout and continue.
Ubuntu keyboard layout settings
Now you can choose between the Normal and Minimal installations. We recommend sticking with the Normal installation since it offers more helpful utilities and software packages. Additionally, select the option to download updates to get the latest possible version.
Ubuntu installer step to select update settings and specify if an user wants normal or minimal installation
For the Installation type, choose Erase disk and install Ubuntu.
Ubuntu installer step to select the installation type
When asked about partition, click on Continue.
Ubuntu installer step warning user about the root partition that will be created
Next up, select the timezone.
Ubuntu installer step allowing user to select their timezone
Lastly, fill in the name, username, and password.
Ubuntu installer step to specify new operating system user
After clicking continue, Ubuntu installation will start. Give it about 20 minutes and restart the computer after installation is done. Once the computer boots up, you should see the default welcome screen.
Ubuntu default desktop screen
Congratulations – you have successfully installed Ubuntu 22.04 on your computer.
Conclusion
Due to its simplicity and versatility, Ubuntu is often the go-to choice for an operating system. Although, not all Linux beginners might know how to install it.
In this tutorial, we’ve covered the main points of Ubuntu installation:
Requirements to install Ubuntu Linux on a desktop computer.
How to make a bootable Ubuntu 22.04 LTS USB device with Rufus.
How to install Ubuntu on a physical Windows machine by wiping out the old operating system.
How to install Ubuntu on a virtual machine by using Oracle VirtualBox software.
257
views
1
comment

What is a Computer Hardware And Networking Maintenance
Job Description The individual in this job is responsible for supporting the organization's computing and telecommunication network operations and procedures. They look after computer peripheral equipment, networks, communications equipment providing support for users' software and hardware needs. Tests, evaluates and recommends data communications hardware and software. Originally Approved Last Revised Code2018/ITES/DGT/02142 SectorIT-ITeS NSQF LevelLevel 4 Notional Hours2080 Accrediting BodiesNational Council for Vocational Training (NCVT) Certifying BodiesNational Council for Vocational Training (NCVT) affiliates the ITIs as per DGT guidelines issued from time to time Proposed Occupation
Computer Hardware & Network Maintenance has a wide scope of Employability ranging from self-employment, contractual employment to Industrial jobs. On successful completion of this course, the candidates shall be gainfully employed in the industries for following occupations:
• Computer System Hardware Analyst
• Hardware Engineer
• Data Communication Analyst
• Network Administrator
International Comparability
1. Existence of any official document suggesting the comparability of the qualification with the qualifications in other countries is not known.
2. However, ITI passed out trainees are getting employment in many Gulf countries, European countries, Australia, New Zealand, Singapore etc.
Progression Pathway
• Can join Apprenticeship programme in different types of industries leading to National Apprenticeship certificate (NAC).
• Can join Crafts Instructor Training Scheme (CITS) in the relevant trade after which they will be employed in ITI/ Vocational Training Institute as instructor.
• Self Employed
Planned arrangements for RPL
1. At present the students who have passed 10th class with minimum 3 years’ experience in relevant field can appear for NCVT theory and practical semester examination directly.
2. The students who have passed SCVT examination in ‘Computer Hardware & Network Maintenance’ trade can also appear for the NCVT Examination in the relevant semester and Trade directly.
68
views
3
comments