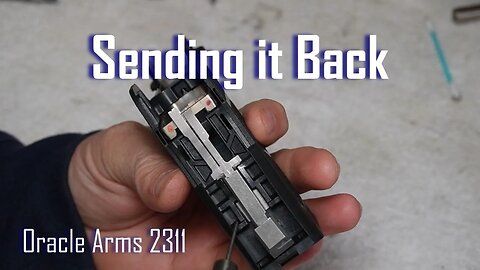
Oracle Arms 2311: Warranty Work and other stuff
As much as I hate to admit it, I can't fix everything. So I'm sending my Oracle Arms 2311 back for some warranty work.
73
views

Is it worth the money? BCM Cosmetic Blem Upper Receiver #itsasteal
If you like buying quality but not paying an arm, leg, and your first born then you should look at the BCM (Bravo Company) Cosmetic Blem Upper Receiver! The upper receiver has no function issues and yet you are getting a discount because of some minor things on how it looks...for almost a third of the price. And we know that the upper receiver will get banged up eventually so why pay extra for that privilege?
I don't expect these to be available for long so get your BCM Cosmetic Blem Upper Receiver right now! While supplies last! I think I could do infomercials. Maybe compete with products like Sham-wow.
146
views
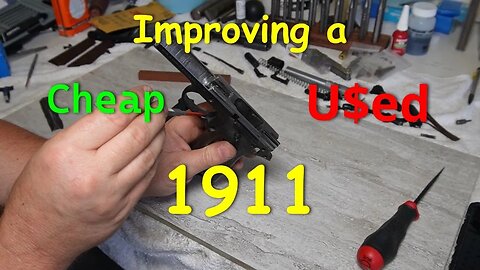
3 Cheap and Simple 1911 Improvements: Frame, Trigger, and Mag Release
You just bought a cheap/used 1911 because you don't have the budget. You notice before buying it that something doesn't feel right with the 1911 but you know that Nobody probably has a video about him tinkering with one. So you take the chance and buy it. You really don't want to put anymore money into it other than a few necessary things...if you have to. In the mean time, you have some basic tools and files lying around, along with some clever "just make it work" know how, and you set off to make your simple improvements to the 1911. And you pushed play...don't forget that part!
For the Cheap and simple 1911 improvements video, we will be working on a Norinco 1911A1. It come over right before the ban and from what I understand the later models, such as mine, didn't have the best tolerance and finish work as the early models. But that is ok. It gives me something to do.
The hard part about tinkering is that there is always a tool to make something simple. However, we often don't have that tool and have to figure out a substitute. Something you have will most likely work well enough to get you over the top. Figure it out and get it done. And then order the right tool for next time! LOL
Here is a list of tools and stuff that you will need for your simple improvements to the 1911:
1. Sandpaper of various grits. In this video I used 400 and 1200. It is what I had on hand.
2. Flat surface: I used a piece of ceramic tile
3. Wheeler 600 grit lapping compound. You may not need this but I did.
4. Trigger track stone: You most likely won't have one. You can substitute a flat needle file that has smooth edges.
5. Files: Needle file set is handy. Any filing I did was with a smooth cut file.
6. Small flathead screwdriver
7. 1/2"x1/2"x6" India stone. The one I used was a fine cut.
8. 1/2" round stock of some kind.
9. Oil. Bare metal will need a coat of oil to prevent rusting.
10. Wildcard. You might have something come up that is different and require SOMETHING I didn't have to use. You will figure it out. If not, send me a message and I'll brainstorm with you.
For your convenience, Video timestamps!
****Timestamps****
00:00 Intro & my appreciation for you!
00:53 Video premise: The used car effect
02:13 Starting Trigger Pull
02:42 Cheap and simple 1911 trigger
07:23 Cheap and simple 1911 magazine release
10:39 Cheap and simple 1911 magazine well
12:29 Next video: More Cheap and simple 1911 improvements!
cheap and simple 1911, egw springs, simple 1911 trigger job, 1911 trigger improvement, fullsize 1911
294
views
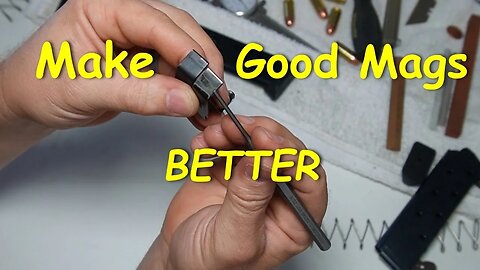
Check-Mate Magazines: Disassembly and Fine tuning
Well I had to get around to getting magazines for the Norinco 1911A1. And I wanted to do it early in the project because I wanted to be able to test everything together, as the work is being done.
I've had Check-Mate magazines before and have been pleased with their reliability. With that said, doesn't mean that a good 1911 magazine can't be made better! Now I want to say that just because I do some work to the magazines, doesn't mean that I believe they would not have worked right out of the box. Just the opposite. I firmly believe that the Check-Mate 1911 magazines would all have performed flawlessly with-out the fine tuning. I WANTED to fine tune the magazines so they felt better to me. Plain and simple.
I appreciate you watching, subscribing, commenting, and supporting me on patreon.
patreon.com/nobodytraining
For your convenience:
****TimeStamps****
00:00 Intro
00:41 Introducing the Check-Mate 1911 8rnd Magazine
02:59 Check-Mate 1911 magazine disassembly
04:34 Check-Mate 1911 magazine assembly
06:46 Check-Mate 1911 magazine fine tuning. Working the follower
10:24 Check-Mate 1911 magazine fine tuning. Working the magazine tube
116
views
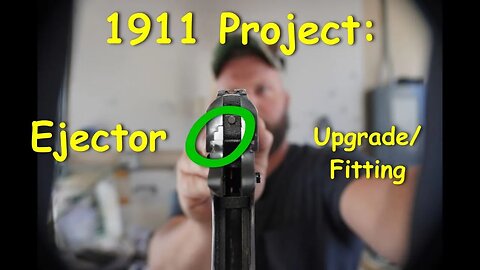
Project 1911: How this noob installs an ejector
What I like about the 1911 is that it is a "thinker's" firearm. One has to observe and understand the relationships of it's components and how they interact/function. AND there is the problem solving...tons of problem solving. To me, that is fun. I am not an expert on the 1911. Just a guy going who is learning by doing. This is my second ejector install. The first ejector I installed was on a Springfield Armory Prodigy and that was really easy. Installation of the ejector on this Norinco 1911A1 was more complicated in that the ejector required more fitting so the slide would operate. What you are about to see is how I went about it.
As always, I appreciate you watching!
For your convenience I have time stamps listed below.
****Time Stamps****
00:00 Stupid Intro
01:26 1911 Tools: 1911 Slide Lapping Tool "Slide Pusher"
02:52 1911 Tools: Power Custom Frame Holder Tip
03:31 1911 Tools: Brownells Swages
04:59 1911 Tools: Tool to make for the ejector
07:09 1911 Ejector Selection EGW Pt#10000 and frame prep
09:50 1911 Ejector Filing "fitting"
11:50 1911 Ejector: Checking for loaded magazine clearance
12:52 1911 Ejector Arm Relief Cut for loaded magazine
13:43 1911 Ejector Pin Drilling with Dawson Precision Ejector Pin Drill Bit
15:25 1911 Ejector final fitting to slide
15:57 1911 Ejector lapping to the slide
16:55 Testing the 1911 ejector and trimming to size
18:03 1911 Ejector Bench top test: Trimmed to final length, improved angles
20:54 Test fire
21:37 Blending the 1911 ejector to the slide
22:08 Finished view of the blended 1911 ejector
22:58 Final comments
patreon.com/nobodytraining if you want to help offset some costs!
351
views

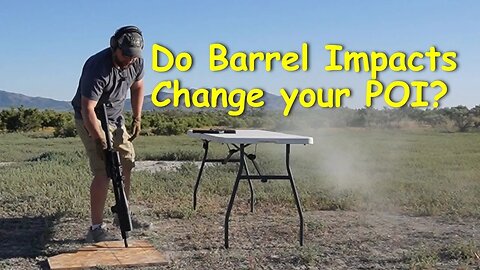
Do barrel impacts change your Point of Impact on un-bedded AR? Is barrel bedding necessary?
This is Part 2! If you are trying to figure out IF barrel bedding is necessary on your AR15 and whether it has any effect on accuracy, then you may want to stick around. Bolt action stocks have been bedded for quite some time in order to squeeze a little more accuracy out of them. But what can you bed on the AR platform? The barrel to the upper receiver! But before we get to that, need to see if or what happens when barrel bedding is not performed.
This is a test of an un-bedded upper receiver from Palmetto State Armory. In the first video I took the upper and free floated it so it would have every chance to be as accurate as it could be. But since it is not a match barrel an inch or 2 will probably be the group size. And that is ok for what we need. The process for this test is to take 3 different rounds and see where they print on target. Then will run 200 rounds through the AR15 at a rapid pace to get it really hot WHILE smacking the barrel on a piece of OSB in between mag changes. The combination of heat and impacts may shift the barrel enough to change the point of impact on the AR15. After it has cooled down the 3 different rounds will be fired to see how they stack up to the control group. If there is a noticeable change then barrel bedding will be the solution. But will there be a change?
In this video, I use:
PSA Freedom Kit w/ nitrided barrel
Vortex Optics Viper HSLR
Midwest Industries 15" free float
Freedom Munitions 223 55gr reman
Fiocchi 223A 55gr FMJBT
AAC 5.56 77gr Matchking
211
views
1
comment
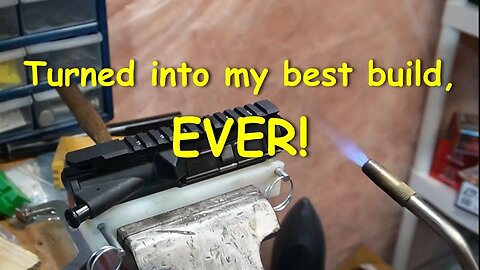
Accidentally On Purpose the BEST AR15 Upper I ever built
The Best AR15 Upper? It sure is. Firing it feels smooth and refined. And the FUNNY thing is that this is what I call Accidentally on Purpose. What do I mean by that? Well, I had this idea back around Christmas that I wanted to build a rifle centered around a #CriterianBarrels Core Series barrel (16" mid-length gas system). I wanted this to be special and give it every chance it could to be long lasting and accurate. Criterian offers matched bolts so I knew that I had to go that route. And since the Core Series has a tapered barrel and therefor is lighter, I had to get a light gas block. In came the Superalitive Arms Titanium gas block. This thing weighs nothing! I didn't enjoy paying for it, which is the only down side. But it works great!
So that was the basis of the upper that I wanted to build at some point. Then I bought the #AntimatterIndustries ScopeSwitch...and I had nothing to put it on. All I can say is that it is a good thing that I like to collect parts because I could build the Best AR15 upper! #BravoCompanyUSA upper receiver, #RadianWeapons charging handle, and #LantacUSA Dragon muzzle completed the deal. I had these lying around waiting for something and that something came around.
This magical combination of parts turned into the best upper receiver that I ever built. Smooth cycling and flat!! Just very refined. You pay for performance sometimes but I have a feeling that this one will be with me for a long time.
Parts:
Criterion Core Series Barrels- barrel, bolt, etc
https://criterionbarrels.com/products/ar-15/ar-15-core-series-mid-length-gas/?v=7516fd43adaa
Superlative Arms
https://suparms.com/collections/adjustable-gas-blocks-direct-impingement/products/625-titanium-adjustable-gas-block-bleed-off-solid-set-screw-grey-dlc-finish
Midwest Industries Rail
https://www.brownells.com/gun-parts/rifle-parts/rifle-handguards-parts/ar-15-combat-handguards-free-float-m-lok/
Raidian Raptor Charging Handle
https://www.brownells.com/gun-parts/rifle-parts/rifle-charging-handle-parts/ar-15-raptor-lt-charging-handle-5.56/?sku=100024307
Lantac Dragon
https://www.brownells.com/gun-parts/rifle-parts/rifle-muzzle-devices/ar-15--dragon-muzzle-brake-22-caliber/
BCM Upper Receiver
https://www.brownells.com/gun-parts/rifle-parts/rifle-receivers-parts/ar-15m4-flattop-upper-receiver-assembly/
The barrel is thermo fit to the upper receiver. It's easy to do.
968
views
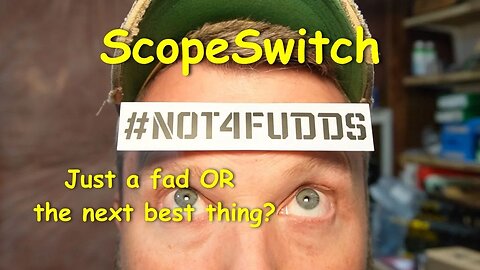
ScopeSwitch Unboxing, Install and Bang Bang
Just when you thought that a platform could not evolve any further, some brilliant soul brings video game performance to real life. Well mostly...there are some caveats. But close enough to get excited about!
The Antimatter Industries Scopeswitch has the potential to change the game. In this first release, the Scopeswitch is in it's first, manually operated form. But Antimatter has teased that there could be a push button version in the future! This will obviously push what some would consider as a high price even higher for the electronic form. Both versions of the Scopeswitch are still a higher cost than what the closest competitor would be, The SwitchView. But is the bang worth the buck...?...get it? I couldn't help myself with the corny dad joke.
In this video, we unbox and examine all the parts, paying particular attention to the extraordinary stickers...ya I'm a little kid at heart. After that comes the installation. Now this is NOT a step by step instruction video. It hits the high points along with the helpful hints and tricks along the way. Finally I head to the range and give final thoughts.
Still reading?! Great! Please consider supporting me on Patreon.
patreon.com/NobodyTraining
I appreciate it!
Parts in this video:
Antimatter Industries Scopeswitch
BCM Upper Receiver
Criterion Core Series 16" barrel
BCM BCG w/ matched bolt
Superlative Arms Titanium Adjustable Gas Block
Lantac Dragon
Midwest Industries 15" Combat Rail
Radian Raptor- SL charging handle
Spike's Tactical Lower Receiver
Geissele Automatics SSA trigger
BCM Stock
Magpul MOE plus grip
SigSauer Tango 6T
Freedom Seeds:
Freedom Munitions 55gr FMJ reloads
137
views
1
comment
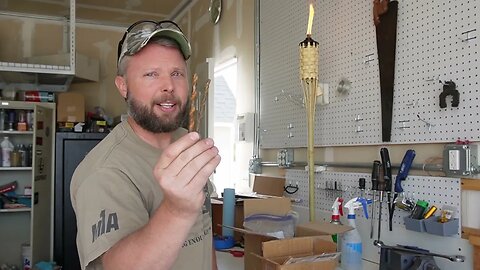
Learning How to Bed a Rifle
It's time to fix the other issues with this old Remington 721! And of course I learn it as I go...at least I hope I'm learning it the correct way. Starting off with pillar bedding. This old stock has seen years of use and that means the stock has been getting compressed, as evidenced by the bolt handle (at least my theory) hitting the stock and not closing all the way. Drilling pillars can be daunting if you've never attempted it before or if you don't have a drill press and you don't want to try to free hand it. Luckily there is a handy jig made by Score-High Gunsmithing! Made to be used with a hand drill. This jig made simple work of drilling out the holes for the pillars. It can also be used on the Remington 700, long and short actions. Both the jig and pillar systems were purchased from MidwayUSA and the part numbers are in the video. Other handy tools used on this project were the Jerry Fisher Stock Scrapers. Also in the video, besides little things I learned along the way is the creative use random steel to use as a forend stiffener to keep the free floated barrel from coming into contact in the future, which can be an issue with a wood stock. If you can, please consider supporting me on Patreon. patreon.com/nobodytraining
Thanks for Watching!
79
views
1
comment

Dangerously UNSAFE Remington 721- Part 1
Have a buddy that has an older Remington Model 721 in 30.06. The PROBLEM is that it will eventually kill someone. The issue is the originally designed trigger. What happened is that out of the 50-60 rounds that he shot, he had 2 that fired without pulling the trigger. This isn't some Alec Baldwin argument, but an actual documented issue. One round was fired when he closed the bolt and the other when he had a round chambered with the safety in the ON position and took the safety off. Luckily both rounds went in a safe direction and no one was hurt. Common sense gun safety (not the excrement that the gun grabbers are saying) actually works.
There is a lot of talk on the forums about the issue affecting the older Remington 700 series (700/721/722 Others?) and what to do. I even found a video of a guy explaining the issue and fix (https://youtu.be/Nz48KyiuGi4). But since this isn't my rifle I figured that doing a "fix" on the trigger group isn't the idea. So I'll replace it with a new trigger. Going with a Timney Elite Hunter.
There are some clearance issues with doing this trigger swap. However, the work is easy but it does take a little bit of time. As with any project, once you dive in you find out that there is always more that you will have to do that your weren't accounting for...hence the need for a Part 2.
91
views
1
comment

Wrong Holosun 509 for the AOS 509T Plate? No Problem!!!
Ordering mistakes happen. Making assumptions happen. Making it work so you don't look like a fool is an art! Story time: I finally decided that I need to learn to shoot with a red dot on my pistols. What better to start with than my Springfield Armory 1911 DS Prodigy! After all, it just needs the right plate for the optic. Well I wanted a closed emitter housing so I decided on the Holosun 509 with the ACSS Vulcan reticle. I waited for the Agency Arms Optic Plate (AOS) 509T to come available and ordered it. When it arrived I eagerly ran down to the work bench so I could put it on and to my surprise...something was wrong. The Holosun was too big for the plate and things just weren't lining up. This was like getting socks for Christmas! Disappointed I contemplated my options. Looking closely, I spotted glimmers of hope and a plan formulated in the deep recesses of my mind.
If you enjoy the content, please consider supporting me on Patreon. This stuff gets expensive and anything you do to help is greatly appreciated.
patreon.com/nobodytraining
48
views

Atlas Gunworks +P RUN ALL ammo Modification- Springfield Prodigy
I SHOULD be happy that I can run almost any ammo in my Springfield Prodigy 1911 DS 4.25" but it isn't good enough. If there is room for improvement, I'm going to find it! My thought is that the solution lies with the Atlas Gunworks Tooless Guiderod and how it was designed. As with all of my videos, I start this off with the concept and work through it, not knowing if and how it will turn out so you can be amazed or disappointed along with me!
Now I want everyone to know, I do not believe that the Atlas Tooless Guiderod is a bad or flawed product. It has been excellent in most of the circumstances that I've put it in. However, I do believe that it has greater potential and this is my attempt to find it. If this just so happens to work, @AtlasGunworks feel free to use it. Just give it a cool name like Nobody's Upgraded blah blah or whatever.
If you've read this far, please consider supporting me on Patreon. Making these videos does take time and money. Any support you could give helps offset the cost. $3, $5, and $10 donation tiers so it doesn't cost a ton to donate. And Thank You!
patreon.com/NobodyTraining (copy and paste in search bar)
Parts used: 4.25" Prodigy
EGW Ignition Kit w/ 19lb mainspring
10-8 Performance Slide Stop
Atlas Perfromance Short curved trigger
Atlas Gunworks Tooless Guiderod
Wilson Combat Bulletproof Firing Pin
Wolff Extra Power Firing Pin Spring
ISMI 14lb recoil spring
Hardened Pin Kit from either 10-8 or EGW...can't remember. It's in a video somewhere...
Streamlight 1000 Lumen Light
179
views

Dry Prodigy runs like a GLOCK?
Lube/oil is your friend and it helps in the reliability of your firearm. But what happens to that reliability if you take the lube away?!? It becomes a test of the quality of the firearm, the gunsmith, or in my case, my tinkering skills. A comment on one of my videos sparked me to go out and see how good my Prodigy performs since I fixed and upgraded it.
There has been lots of controversy about the Springfield Armory Prodigy 1911 DS reliability. Some are saying that they've had no issues, but many, many more are complaining about the issues they are having. Does it have to be this way? I don't believe so. Unfortunately for some, it requires taking some time and initiative to get the Prodigy over the finish line and make it the quality firearm it should have been when it left the factory. And fortunately for some, it requires taking some time and initiative to get the Prodigy over the finish line and make it the quality firearm it should have been when it left the factory! It all depends on how you look at it!! Make it fun.
And if you can, support me on Patreon! This stuff is expensive and time consuming and anything helps. I really appreciate it.
patreon.com/NobodyTraining
Parts used: 5" Prodigy
EGW Ignition Kit w/ 19lb mainspring
10-8 Performance Slide Stop
Atlas Perfromance Short Flat trigger
Dawson Precision Tooless Guiderod
Wilson Combat Bulletproof Firing Pin
Wolff Extra Power Firing Pin Spring
Wilson Combat Bulletproof Wide Thumb Safety
ISMI 10lb recoil spring
Hardened Pin Kit from either 10-8 or EGW...can't remember. It's in a video somewhere...
Surefire X300 Light
That's most of it...but I'm sure I'm forgetting something.
468
views


Atlas Tooless Guiderod vs JHP Mega Test- Oh Crap Gun Prodigy Build
The JHP Mega Test was put on hold due to premature lock back of the Atlas Tooless guiderod...and sheep. But no sheep today and I hopefully have the fix from Atlas that corrects the issue. So today we will continue testing to see if all of the fixes and upgrades that I put into the Springfield Prodigy 1911 DS 4.25" to make it my "Oh Crap Gun" was worth it. What makes it worth it? Well, I'm looking to see if it will function with different bullet brands, weights, shapes, sizes, etc. If it will run it all, Great!! If most, I'll take it. The point is that I need to know what it can and can't do.
...and sorry about the stupid auto focus
Video chapters
0:00 Stupid intro
0:34 Atlas Gunworks Tooless Guiderod- Problem and solution?
2:12 Ammo that is in the test
3:40 Begin test fire- Failures and swapping out parts during test
11:44 Conclusion
Ammo used
PMC Bronze 115gr for basic function test
Hornady Handgun Hunter 115
Hornady American Gunner 115 XTP
Sierra Outdoor Master 124
Winchester Defender 124 +P
Hornady American Gunner 124 XTP +P
Hornady Custome 124 XTP
Federal Hydra-Shok 124
Remington Golden Saber Bonded 124 +P
Federal Hydra-Shok Deep 135
Hornady Critical Duty 135 FlexLock
Winchester Defender147
Federal Hydra-Shok 147
Extra
American Eagle FMJ 147
Federal Syntech Action Pistol 150
The Prodigy has been upgraded with the following parts:
Atlas Gunworks Tooless Guiderod
Atlas Gunworks Curved trigger
EGW Ignition Kit with 19lb mainspring and lightened hammer
EGW- ISMI 12.5lb recoil spring, also used 14lb spring in video
EGW hardened pin set
Wilson Combat Bullet Proof Firing Pin
Wolff Extra Power Firing Pin Spring
Ed Brown Extractor
I think I got it all...
245
views

How to Replace the Ejector- SA Prodigy and Other 1911 Style Platforms
Did you just break your ejector on your Springfield Armory Prodigy, 1911, or 2011 pistol? Or are you wanting to upgrade the MIM ejector that came with it? Either way, most of what you are about to see is applicable with some exceptions, of course, and I'm sure you can figure it out since you are willing to do the work yourself. Did I mention that this was my first time doing this? If I can figure it out on the fly then you can as well. I have faith!
Most of the work performed is with basic tools with the exception of one, the Dawson Precision Ejector Drill Bit ($8, part# is in the video) that I used to drill out the pin slot on the EGW Extra Long Ejector #10011. This bit is designed specifically for this purpose and is reversed cut so it helps pull the part tight to the frame. I still used a small vise to make sure though.
Time expected to do the work: a lazy afternoon.
Platform: Springfield Armory Prodigy 1911 DS 5" (4.25" would be the same)
Time Stamps:
0:00 Stupid intro- but I found it entertaining
2:37 Examining the EGW Extra Long Ejector
3:44 Removing the old extractor
5:56 Comparing the new and old ejectors
6:49 Installing the new EGW Ejector
7:44 Dawson Precision Drill Bit- which to use?
9:09 Briefly drooling while talking about the Oracle Arms 2311- I want one
9:24 Game plan for drilling the pin hole with out messing it up
10:14 Drilling and what can happen
11:22 Ejector Pin install
11:52 Fitting the new Ejector to the Slide- the most time consuming part!
16:26 Trimming the Ejector Arm
18:22 Benchtop testing of Ejector
193
views
Oh Crap Gun - Springfield Prodigy JHP Mega Test- After Fix and Upgrades
After you, a gunsmith, or Springfield Armory fixes your Prodigy 1911 DS (and same with any upgrades/upgrading) you should always perform a test fire and see how it functions. The purpose of this particular 4.25" Prodigy is to be my Oh Crap gun. I have to figure out what ammunition it can handle flawlessly and what to avoid. FMJ is good for practice firing but the real test is with jacketed hollow points (JHP). The Mega Test consists of JHP weights 115gr, 124gr, 135gr, and 147gr and from every manufacture that was on the shelf at my local store. I even found some 150gr FMJ's to try. I wanted as many different designs and sizes to test the work that I did and so you could see any potential issues that you might have with your Prodigy.
A couple of key things to know about this 4.25" SA Prodigy.
Main Upgrades:
Atlas Gunworks- Curved Short Trigger, One Piece Guiderod
EGW Ignition Kit w/ 19lb mainspring, Hardened Pin Kit
ISMI 12.5 LB recoil spring
Wolff Extra Power firing pin spring
Wilson Combat Bullet Proof firing pin
10-8 Performance Slide Stop
Ed Brown Extractor (it was the EGW HD extractor but I changed last minute, was having an issue with it)
I think that is most if not all...
Main Fixes:
Finished Reamed the Chamber and polished
Feed Ramp polishing
De-burr firing pin hole
381
views

Testing the Science of Barrel Bedding the AR15 pt 1
This series strives to answer whether or not it is necessary to bed your barrel to your upper receiver. And hopefully entertain you a little. Since there are those who say that bedding your barrel is a must and plenty who say that it isn't necessary, the only way to definitively come up with the answer is to just put in the work. But first we have to get the upper receiver in the right shape to perform the tests. The test bed is a Palmetto State Armory complete upper receiver, which will be stripped down and then free floated (I walk you through the process). It will be fun.
Cool stuff you will see besides me:
Older Midwest Industries free float (exciting!)
PSA Freedom Rifle Kit w/ Nitride Barrel
Seekins Precision adjustable gas block
A2 Armorer's Block w/specialty punch
Handguard removal tool
AR15 Barrel Action Rod w/ 360 degree mobility! (Oooo Aaahhhh!)
...and much much more!
I couldn't help myself. Just watch so I can stop typing this description...
84
views

Pt 5- Upgrades- Building the Oh Cr&p Gun- Nobody's Bad Day Upgrading the 4.25" SA Prodigy
Part 5- Springfield Armory 4.25" Prodigy 1911 DS Upgrades with the how to fit and install them. But I have to warn you. Nobody's day goes from good to bad and you get to see it in all of it's cringy glory...well part of it. It would be a 6 hour video if that was the case. What is seen on the Prodigy can also be applied to the 1911 platform (with exceptions). For your convenience, all of the major parts are time stamped below.
Time Stamps
2:29 Pre-Upgrade function check- Did some work in the previous video and want to make sure we have a working Prodigy to start.
4:30 10-8 Performance Slide Stop fitting and install
9:01 Misc slide parts comparison before install
13:15 Wilson Combat Bullet Proof Firing Pin Stop fitting
16:30 Wilson Combat Bullet Proof Firing Pin with Wolff Extra Power spring- Install with unexpected problem.
19:45 EGW HD Extractor Fitting and Install. An Oops on this one
24:01 Atlas Gunworks DLC One Piece Guiderod w/ ISMI 12.5lb recoil spring. Spring requires fitting
155
views
Pt 4: 'Oh Cr&p' Gun- Bunch of Miscellaneous Work- Springfield Prodigy
Part 4 accomplishes a lot of things in preparation of installing upgrades on the Springfield Armory Prodigy 1911 DS. It also may have solved the light primer strike issue. For your convenience I have added time stamps so you can jump to a particular problem if so desired. All work is done with simple tools with none more complicated than a Dremel.
Time Stamp
:45 Addressing sharp corners around breach face
1:52 Disconnector/Slide interface- Polish and deburr
4:23 Breach face polish
5:55 Shameless plug for Likes
6:34 De-horn firing pin hole
7:46 Unexpected firing pin channel problem with solution
12:17 Simple trigger guard screw modification
15:28 Disconnector frame hole & Disco clean up/polish
18:48 Magazine release check
19:29 Trigger channel fit test and fix
168
views
Pt 3: The Barrel- Building the Oh Crap gun SA Prodigy 4.25"
Pt 3 begins the fun work of addressing the issues that were noticed during Pt 2 & 2.1 and it all centers around the barrel. Tools needed can be as simple as different grits of sandpaper and hand files, up to dremels and a Sawzall (not really but you'd watch for that!). The one special tool that can't be faked is the FINISH CHAMBER REAMER. If you don't have one, or a friend with one, this might be the time you send it back to Springfield Armory to have your Prodigy reamed. But finish watching the video first. You're this far in so you might as well.
The point of the work is to make the Prodigy (hopefully) more reliable when it shoots JHP rounds of all shapes and brands. Tall order but I'm going for it. During the JHP test fire, several malfunctions and chambering issues were noticed and this work should resolve it. And please forgive me. I was getting over a really nasty cold while shooting the vid so the struggle was real.
65
views

Pt 2.1 Springfield Prodigy Oh Crap Gun -Testing I should have done
I tried to go cheap and make the rounds I bought for testing stretch and that was a mistake. I was overconfident because FMJs (115 & 124) chambered with no issues into the Springfield Armory 4.25" 1911 DS. Testing with the various hollow points revealed issues such as lite primer strikes, failure to feed, failure to battery, and very inconsistent ejection. I should point out that the 4.25 Prodigy that I'm using is one that I purchased the first week the Prodigy came out . It may not be indicative of Prodigy's that are hitting the market right now or in the future. Most of the common malfunctions should have been worked out by now on the production line.
The jacketed hollow points the I tested are as follows:
Hornady Handgun Hunter 115gr
Speer Gold Dot 115gr
Hornady American Gunner 124gr
Sierra Outdoor Master 124gr
Federal Hydra-Shok Deep 135gr
Hornady Critical Duty 135gr
Federal Hydra-Shok 147gr
150
views

Part 2: Springfield Prodigy 4.25 Building the Oh Crap Gun -JHP Testing
To me, building the 'Oh Crap' Gun needs to start with shooting. Testing different ammo types and bullet shapes is a must. Doing so will point out early on the level of work that it will need. If the gun (in my case the Springfield Armory Prodigy 4.25") will eat everything that you put into it, then the world is your oyster. If not, you have to decide if you are going to fix it or go with what it likes. Your call.
After shooting, you'll have a good idea of what should or needs to be upgraded/changed in order to suit your needs. Do you have malfunctions, failure to feed, failure to extract, extraction issues, hang ups, uncomfortable control features, or any of the other myriad of potential items that may be an issue on your build. For me, I'm going to focus on reliability and comfortable to shoot. I don't want to overcome obstacles with the gun if an 'Oh Crap' situation occurs. And I'm sure there will be other stuff but we will cross that bridge when we get there.
Thanks for Watching!
64
views

Happy New Year 2023
Happy New Year to all and thank you for all the faith you have put in me.
11
views