

Building the Shop - Part 1 - Working on the Permit
If you're planning on applying for your own permit this episode might be for you.
We're learning all kinds of new things during this process that we will be sharing with you as we go along.
I have to admit that I was very nervous starting this process but hopefully this video will give you some idea what's needed and put you a bit more at ease.
Here is the link to the Example Building Permit Form that I followed: https://www.get.on.ca/uploads/userfiles/files/building-permits/GET%20guide%20-%20How%20to%20fill%20out%20a%20permit%20application.pdf
Until the next one, keep Living the Northern Life!
You can help support the channel if you Subscribe and hit the Bell notification for All updates so that you are notified when I post a new video.
We have a new Patreon account as well if you would be willing to support us this way as well.
https://www.patreon.com/livingthenorthernlife
You can also help support the channel by clicking on the links to any of the items below.
Even if you choose not to purchase any of these items we would receive a commission if you purchase any item from Amazon within 24 hours of clicking on any link below.
Amazon Affiliate Link
Canada: https://amzn.to/31AufV8
USA: https://amzn.to/34HXNT2
9 inch Chainsaw Tooth Brush Blade
Canada: https://amzn.to/2CQJPm7
USA: https://amzn.to/2ECFlQB
0:00 Intro
0:10 Plans
5:02 Example Building Permit Application Form
6:02 Minor Variance
6:53Outro
32
views
1
comment
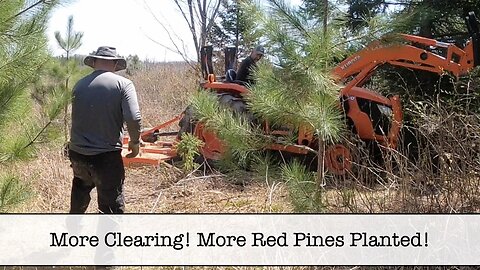
More Land Clearing
Things happen unexpectedly and we have to clear a tree that fell close to the trailer.
Showing the power of the Milwaukee M18 Fuel Hatchet Pruning Saw that I bought for my wife to use.
Added a tarp on the firewood shed to stop the rain from being able to get to it.
Until the next one, keep Living the Northern Life!
You can help support the channel if you Subscribe and hit the Bell notification for All updates so that you are notified when I post a new video.
We have a new Patreon account as well if you would be willing to support us this way as well.
https://www.patreon.com/livingthenorthernlife
You can also help support the channel by clicking on the links to any of the items below.
Even if you choose not to purchase any of these items we would receive a commission if you purchase any item from Amazon within 24 hours of clicking on any link below.
Amazon Affiliate Link
Canada: https://amzn.to/31AufV8
USA: https://amzn.to/34HXNT2
9 inch Chainsaw Tooth Brush Blade
Canada: https://amzn.to/2CQJPm7
USA: https://amzn.to/2ECFlQB
0:00 Intro
0:10 Plans
1:53 Milwaukee M18 Fuel Hatchet Review
2:48 Clarification
3:29 Put a Tarp
4:13 Clearing at the Farm with my Stepfather
9:51v Moving the Kayak Trailer
11:29 Closing Remarks
12:20 Outro
34
views
1
comment

More Land Clearing
Until the next one, keep Living the Northern Life!
0:00 Intro
0:10 Plans
10:00 Closing Remarks
11:00 Outro
You can help support the channel if you Subscribe and hit the Bell notification for All updates so that you are notified when I post a new video.
We have a new Patreon account as well if you would be willing to support us this way as well.
https://www.patreon.com/livingthenorthernlife
You can also help support the channel by clicking on the links to any of the items below.
Even if you choose not to purchase any of these items we would receive a commission if you purchase any item from Amazon within 24 hours of clicking on any link below.
Amazon Affiliate Link
Canada: https://amzn.to/31AufV8
USA: https://amzn.to/34HXNT2
9 inch Chainsaw Tooth Brush Blade
Canada: https://amzn.to/2CQJPm7
USA: https://amzn.to/2ECFlQB
45
views
1
comment
Screws on the Flat or on top of the Ribs?
Just a question as to why most put screws on the flat of the metal rook instead of on the top of the ribs?
Until the next one, keep Living the Northern Life!
You can help support the channel if you Subscribe and hit the Bell notification for All updates so that you are notified when I post a new video.
We have a new Patreon account as well if you would be willing to support us this way as well.
https://www.patreon.com/livingthenorthernlife
You can also help support the channel by clicking on the links to any of the items below.
Even if you choose not to purchase any of these items we would receive a commission if you purchase any item from Amazon within 24 hours of clicking on any link below.
Amazon Affiliate Link
Canada: https://amzn.to/31AufV8
USA: https://amzn.to/34HXNT2
9 inch Chainsaw Tooth Brush Blade
Canada: https://amzn.to/2CQJPm7
USA: https://amzn.to/2ECFlQB
44
views
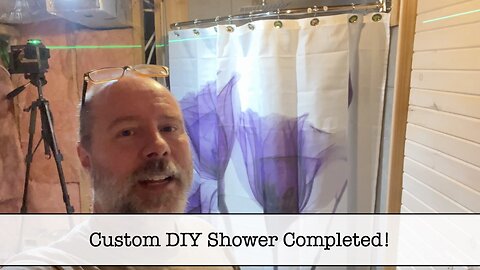
Replacing our Old Shower - Part 8
Amazon Link for the Shower Taps
Canada: https://amzn.to/49S3mNe
USA: https://amzn.to/49TFARa
This is the last video in our series on building our new shower to replace our old one.
We're grouting the everything but the corners and we will be using a coloured silicon for all the corners where there are joints.
This was a great project for us and I think it turned out extremely well.
Here is the link to Jeff from Home Renovision: https://youtu.be/kM1lSU5QR4o?si=BgEEv1nnzKdjwkPC&t=3002
Until the next one, keep Living the Northern Life!
You can help support the channel if you Subscribe and hit the Bell notification for All updates so that you are notified when I post a new video.
We have a new Patreon account as well if you would be willing to support us this way as well.
https://www.patreon.com/livingthenorthernlife
You can also help support the channel by clicking on the links to any of the items below.
Even if you choose not to purchase any of these items we would receive a commission if you purchase any item from Amazon within 24 hours of clicking on any link below.
Amazon Affiliate Link
Canada: https://amzn.to/31AufV8
USA: https://amzn.to/34HXNT2
9 inch Chainsaw Tooth Brush Blade
Canada: https://amzn.to/2CQJPm7
USA: https://amzn.to/2ECFlQB
0:00 Intro
0:29 Plans
3:05 Starting the Grouting
14:37 Siliconing the Corner Joints
19:37 Completing the Shower Fixtures
21:36 Testing the Shower
22:48 Installing the Curtain Rod
25:20 Closing Remarks
26:12 Outro
37
views
1
comment
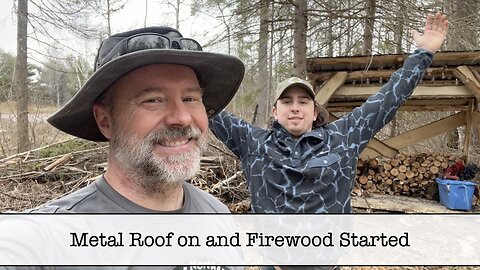
Metal Roofing and Campsite Cleanup
In this episode we're Installing the Metal Roofing of the Firewood Shed and Campsite Cleanup.
It's time to get rid of the logs we've had just piled up and in the way.
We're hoping that now we can have some dry firewood for our campfires and lunches.
We install our screws on the ribs of the metal. We feel this is better as wate has no place to sit when the screws are on top of the rib.
Of course we have to be careful to not crush the rib by tightening the screw too much but water, snow and ice should run down the rib.
We use the Milwaukee M18 Fuel Hatchet on a Maple Tree without any issue. The center of the tree is a bit rotten but still, this thing is amazing.
Until the next one, keep Living the Northern Life!
You can help support the channel if you Subscribe and hit the Bell notification for All updates so that you are notified when I post a new video.
We have a new Patreon account as well if you would be willing to support us this way as well.
https://www.patreon.com/livingthenorthernlife
You can also help support the channel by clicking on the links to any of the items below.
Even if you choose not to purchase any of these items we would receive a commission if you purchase any item from Amazon within 24 hours of clicking on any link below.
Amazon Affiliate Link
Canada: https://amzn.to/31AufV8
USA: https://amzn.to/34HXNT2
9 inch Chainsaw Tooth Brush Blade
Canada: https://amzn.to/2CQJPm7
USA: https://amzn.to/2ECFlQB
0:00 Intro
0:10 Plans
1:14 Taking the Tarp Off
1:58 Installing the Metal Roof
3:40 Cutting Logs for Firewood
4:58 Milwaukee M18 Fuel Hatchet and Maple Tree
5:28 Lunch with Trinity and Grandpa Marcel
6:47 Closing Remarks
7:14 Outro
55
views
1
comment
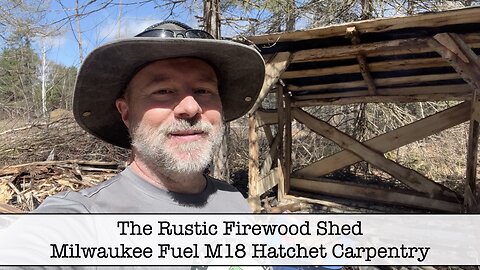
The Rustic Firewood Shed Milwaukke Fuel M18 Carpentry
Today we are building, Until the next one, The Rustic Firewood Shed using the Milwaukee Fuel M18 Hatchet and doing some chainsaw Carpentry.
This was a lot of fun and not as difficult as I thought it would be.
Granted this is not traditional joinery which I should be practicing but we just want to get a shed built to store our Firewood in.
We also planted 5 cedar trees behind our Big Rock which we had been planning to do for a couple years now.
Join us as we build our firewood shed.
Until the next one, keep Living the Northern Life!
You can help support the channel if you Subscribe and hit the Bell notification for All updates so that you are notified when I post a new video.
We have a new Patreon account as well if you would be willing to support us this way as well.
https://www.patreon.com/livingthenorthernlife
You can also help support the channel by clicking on the links to any of the items below.
Even if you choose not to purchase any of these items we would receive a commission if you purchase any item from Amazon within 24 hours of clicking on any link below.
Amazon Affiliate Link
Canada: https://amzn.to/31AufV8
USA: https://amzn.to/34HXNT2
9 inch Chainsaw Tooth Brush Blade
Canada: https://amzn.to/2CQJPm7
USA: https://amzn.to/2ECFlQB
0:00 Intro
0:10 Plans
1:26 Milwaukee Laser Setup
1:42 Shed Posts and Debarking
3:36 iPhone Level
5:02 Measuring for the Back Post
5:56 Milwaukee Hatchet is Awesome
6:15 Standing the Posts Up
7:10 Planting Cedars Behind the Rock
9:26 Back to Building the Firewood Shed
11:33 Lunch Break
11:55 Will it Stand on its Own
13:46 Closing Remarks
15:16 Outro
64
views
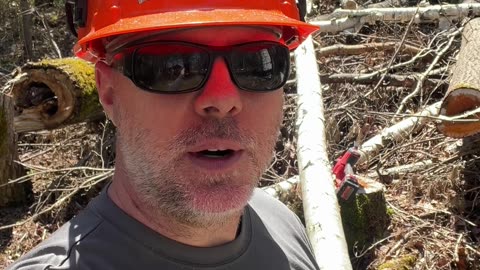
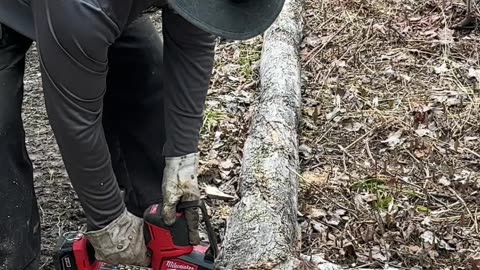
Milwaukee M18 Fuel Hatchet vs Birch Tree #shorts
I got a few dislikes from my last video but no comments as to what they disliked.
I assume it's due to cutting a maple tree that was a bit rotten in the middle.
So, we're doing this again with a larger, no rot, almost 8inch's across birch tree.
The Milwaukee M18 Fuel Hatchet walks through it with out issue again.
I still can't beleive the power this little saw has.
Is it designed for this work? Absolutely not!
I'm just showing the power of this little saw.
Until the next one, keep Living the Northern Life!
You can help support the channel if you Subscribe and hit the Bell notification for All updates so that you are notified when I post a new video.
We have a new Patreon account as well if you would be willing to support us this way as well.
https://www.patreon.com/livingthenorthernlife
You can also help support the channel by clicking on the links to any of the items below.
Even if you choose not to purchase any of these items we would receive a commission if you purchase any item from Amazon within 24 hours of clicking on any link below.
Amazon Affiliate Link
Canada: https://amzn.to/31AufV8
USA: https://amzn.to/34HXNT2
9 inch Chainsaw Tooth Brush Blade
Canada: https://amzn.to/2CQJPm7
USA: https://amzn.to/2ECFlQB
39
views
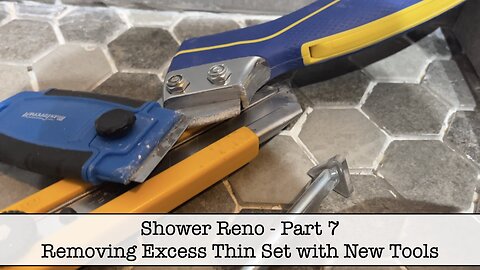
Replacing our Old Shower - Part 7
Welcome to Day 5 of our Replacing our Old Shower - Part 7 series.
We have some more QEP tools and we're knocking the clips off.
Knocking the clips off was a bit satisfying :) but you can see that I left a lot of thin set behind that needs to be cleaned up...
Cleaning up the thin set took me A LOT of extra hours that I hadn't planned for.
I should have worked a lot cleaner than I did that's for sure.
Until the next one, keep Living the Northern Life!
You can help support the channel if you Subscribe and hit the Bell notification for All updates so that you are notified when I post a new video.
We have a new Patreon account as well if you would be willing to support us this way as well.
https://www.patreon.com/livingthenorthernlife
You can also help support the channel by clicking on the links to any of the items below.
Even if you choose not to purchase any of these items we would receive a commission if you purchase any item from Amazon within 24 hours of clicking on any link below.
Amazon Affiliate Link
Canada: https://amzn.to/31AufV8
USA: https://amzn.to/34HXNT2
9 inch Chainsaw Tooth Brush Blade
Canada: https://amzn.to/2CQJPm7
USA: https://amzn.to/2ECFlQB
0:00 Intro
0:10 Plans
0:36 Knocking Clips Off
3:27 QEP Grout Saw
6:38 Should I have Built out from the Center
7:22 Triangle QEP Grout Removal Tool
7:59 No One Tool Can Do it All
10:19Closing Remarks
12:52 Outro
49
views
2
comments

Did you get your Meat Temperature Cooking Magnet?
Did you get your Meat Temperature Cooking Magnet?
Amazon Link:
USA: https://amzn.to/3WkFcqQ
Canada: https://amzn.to/4a1RmIn
Until the next one, keep Living the Northern Life!
You can help support the channel if you Subscribe and hit the Bell notification for All updates so that you are notified when I post a new video.
We have a new Patreon account as well if you would be willing to support us this way as well.
https://www.patreon.com/livingthenorthernlife
You can also help support the channel by clicking on the links to any of the items below.
Even if you choose not to purchase any of these items we would receive a commission if you purchase any item from Amazon within 24 hours of clicking on any link below.
Amazon Affiliate Link
Canada: https://amzn.to/31AufV8
USA: https://amzn.to/34HXNT2
9 inch Chainsaw Tooth Brush Blade
Canada: https://amzn.to/2CQJPm7
USA: https://amzn.to/2ECFlQB
56
views
1
comment
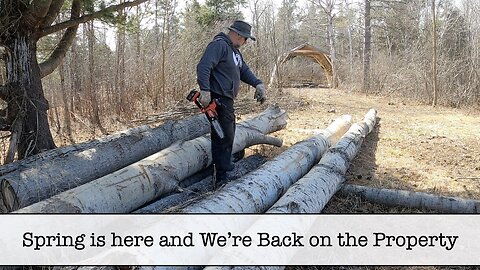
Back to the Property
We are back to the property, clearing some brush preparing for the shop build.
Ee have to take down some dead birch trees so that they don’t fall on anyone.
Having some issues with my GoPro 8 again and lost a bunch of video.
Using my Milwaukee Fuel M18 Hatchet for the first time to mark the lengths of logs I want to mill.
Clearing out in front of where the house is going to go.
We were busy in this episode.
Until the next one, keep Living the Northern Life!
You can help support the channel if you Subscribe and hit the Bell notification for All updates so that you are notified when I post a new video.
We have a new Patreon account as well if you would be willing to support us this way as well.
https://www.patreon.com/livingthenorthernlife
You can also help support the channel by clicking on the links to any of the items below.
Even if you choose not to purchase any of these items we would receive a commission if you purchase any item from Amazon within 24 hours of clicking on any link below.
Amazon Affiliate Link
Canada: https://amzn.to/31AufV8
USA: https://amzn.to/34HXNT2
9 inch Chainsaw Tooth Brush Blade
Canada: https://amzn.to/2CQJPm7
USA: https://amzn.to/2ECFlQB
0:00 Intro
0:10 Plans
6:00 Closing Remarks
7:17 Outro
47
views
Milwaukee M18 Fuel Hatchet
The Milwaukee M18 Fuel Hatchet is awesome and I have really been impressed with it.
If you're thinking about it, I would recommend it that's for sure.
Until the next one, keep Living the Northern Life!
You can help support the channel if you Subscribe and hit the Bell notification for All updates so that you are notified when I post a new video.
We have a new Patreon account as well if you would be willing to support us this way as well.
https://www.patreon.com/livingthenorthernlife
You can also help support the channel by clicking on the links to any of the items below.
Even if you choose not to purchase any of these items we would receive a commission if you purchase any item from Amazon within 24 hours of clicking on any link below.
Amazon Affiliate Link
Canada: https://amzn.to/31AufV8
USA: https://amzn.to/34HXNT2
9 inch Chainsaw Tooth Brush Blade
Canada: https://amzn.to/2CQJPm7
USA: https://amzn.to/2ECFlQB
53
views
1
comment
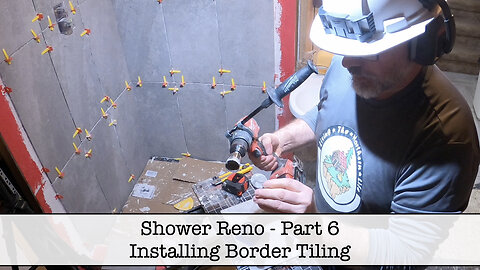
Replacing our Old Shower - Part 6 - Finishing The Border Tiles
Amazon Link for the Shower Taps
Canada: https://amzn.to/49S3mNe
USA: https://amzn.to/49TFARa
Welcome back to the next chapter of our renovation journey as we near the completion of our shower renovation project. In this episode, "Replacing our Old Shower - Part 6 - Finishing The Border Tiles," we continue our DIY adventure by setting the border tiles and cutting a hole for the shower head pipe.
Join us as we tackle these final touches, armed with determination and a new QEP tool to aid in the process. Despite a hiccup with our GoPro camera, we press on, documenting our progress and sharing our insights along the way.
Utilizing Sketchup to plan and visualize the layout, we meticulously draw the front of the shower, ensuring accurate angles and lengths for the tiles. This strategic approach proves to be a lifesaver, guiding us through the installation process with precision and efficiency.
As we set the border tiles and cut the necessary holes, we're reminded once again that while we may not be professionals, our passion for DIY and commitment to quality shine through in every aspect of our work.
Join us as we put the finishing touches on our shower renovation, bringing our vision to life one tile at a time. Stay tuned for more updates as we wrap up this chapter of our renovation journey.
Until the next one, keep Living the Northern Life!
You can help support the channel if you Subscribe and hit the Bell notification for All updates so that you are notified when I post a new video.
We have a new Patreon account as well if you would be willing to support us this way as well.
https://www.patreon.com/livingthenorthernlife
You can also help support the channel by clicking on the links to any of the items below.
Even if you choose not to purchase any of these items we would receive a commission if you purchase any item from Amazon within 24 hours of clicking on any link below.
Amazon Affiliate Link
Canada: https://amzn.to/31AufV8
USA: https://amzn.to/34HXNT2
9 inch Chainsaw Tooth Brush Blade
Canada: https://amzn.to/2CQJPm7
USA: https://amzn.to/2ECFlQB
0:00 Intro
0:10 Plans
0:41 QEP Diamond Hole Drill Bit
2:13 Sketchup Measurements for the Neo-Angle for the shower
2:14 Lining Up the Tiles in the 24" QEP Tile Cutter
4:28 Using the Diamond Blade Hole Saw
6:37 Two Batches of Thinset
6:49 Work Begins
8:22 Camera Pointed in the Wrong Location
8:46Closing Remarks
9:35 Outro
45
views
1
comment

Replacing our Old Shower - Part 5 - Installing the Wall Tiles
Amazon Link for the Shower Taps
Canada: https://amzn.to/49S3mNe
USA: https://amzn.to/49TFARa
Welcome back to the next installment of our renovation journey as we embark on the next phase of transforming our old shower into a modern oasis. In this episode, "Replacing our Old Shower - Part 5 - Installing the Wall Tiles," we tackle the task of installing the big 12x24 wall tiles, a pivotal step in bringing our vision to life.
Join us as we guide you through the process of meticulously placing each tile, emphasizing the importance of working as clean as possible. Drawing from our own experiences, we share valuable lessons learned, stressing the significance of cleanliness to ensure a seamless and successful installation.
With careful planning and execution, we take a methodical approach, starting with the first row and allowing it to set before progressing further. This strategic method minimizes weight on the wall, preventing tiles from slipping or shifting unexpectedly.
Despite initial nerves, our confidence grows as we witness the effectiveness of our technique. Thanks to the quality of our thinset and attention to detail, our tiles adhere securely to the wall, creating a sturdy and reliable foundation for our shower.
As each row takes shape, we're reminded of the importance of patience and precision in achieving professional-looking results. With every tile securely in place, we're one step closer to realizing our vision of a revitalized shower space.
Join us as we continue this journey of transformation, navigating the challenges and triumphs of DIY renovation. Stay tuned for more updates as we progress further in our quest to create the ultimate shower experience.
Until the next episode, remember to keep Living the Northern Life!
You can help support the channel if you Subscribe and hit the Bell notification for All updates so that you are notified when I post a new video.
We have a new Patreon account as well if you would be willing to support us this way as well.
https://www.patreon.com/livingthenorthernlife
You can also help support the channel by clicking on the links to any of the items below.
Even if you choose not to purchase any of these items we would receive a commission if you purchase any item from Amazon within 24 hours of clicking on any link below.
Amazon Affiliate Link
Canada: https://amzn.to/31AufV8
USA: https://amzn.to/34HXNT2
9 inch Chainsaw Tooth Brush Blade
Canada: https://amzn.to/2CQJPm7
USA: https://amzn.to/2ECFlQB
0:00 Intro
0:10 Plans
1:41 Mixing Thinset
2:20 Lash Leveling Kit
2:38 Day 1 - Setting the First Row of Tiles
4:38 Day 2 - Setting the Second Row of Tiles
6:43 Day 3 - Setting the Last Row of Big Tiles
9:17 QEP Tool to set the Leveling Wedges
9:39 Closing Remarks
10:14 Outro
111
views
2
comments

Burning the Branches in the Old House
We need to get rid of these branches to make room for more.
We have a lot of clearing going on and we need room to put more branches to burn this fall.
Until the next one, keep Living the Northern Life!
0:00 Intro
0:10 Plans
5:00 Closing Remarks
6:00 Outro
You can help support the channel if you Subscribe and hit the Bell notification for All updates so that you are notified when I post a new video.
We have a new Patreon account as well if you would be willing to support us this way as well.
https://www.patreon.com/livingthenorthernlife
You can also help support the channel by clicking on the links to any of the items below.
Even if you choose not to purchase any of these items we would receive a commission if you purchase any item from Amazon within 24 hours of clicking on any link below.
Amazon Affiliate Link
Canada: https://amzn.to/31AufV8
USA: https://amzn.to/34HXNT2
9 inch Chainsaw Tooth Brush Blade
Canada: https://amzn.to/2CQJPm7
USA: https://amzn.to/2ECFlQB
71
views
2
comments
New Toy for the Channel
Until the next one, keep Living the Northern Life!
You can help support the channel if you Subscribe and hit the Bell notification for All updates so that you are notified when I post a new video.
We have a new Patreon account as well if you would be willing to support us this way as well.
https://www.patreon.com/livingthenorthernlife
You can also help support the channel by clicking on the links to any of the items below.
Even if you choose not to purchase any of these items we would receive a commission if you purchase any item from Amazon within 24 hours of clicking on any link below.
Amazon Affiliate Link
Canada: https://amzn.to/31AufV8
USA: https://amzn.to/34HXNT2
9 inch Chainsaw Tooth Brush Blade
Canada: https://amzn.to/2CQJPm7
USA: https://amzn.to/2ECFlQB
47
views
3
comments
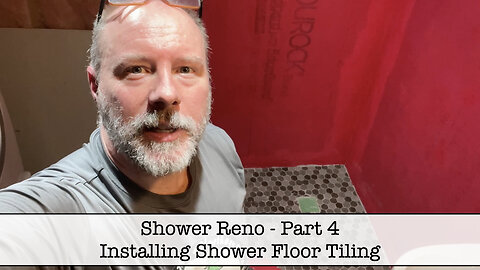
Replacing our Old Shower - Part 4
Amazon Link for the Shower Faucet
Canada: https://amzn.to/49S3mNe
USA: https://amzn.to/49TFARa
Welcome back to the latest chapter of our renovation saga as we continue our mission to revamp our old shower into a modern masterpiece. In this episode, "Replacing our Old Shower - Part 4 - Setting the Floor Tiles," we dive deep into the meticulous process of setting the floor tiles, sharing every step of the journey from beginning to end.
Join us as we navigate the intricacies of tile installation, ensuring precision and attention to detail every step of the way. From preparing the surface to carefully laying each tile, we showcase the entire process, offering valuable insights and tips along the way.
In addition to setting the floor tiles, we tackle the challenge of adjusting our Schluter Drain to align perfectly with the lowest tiles, ensuring both functionality and aesthetics in our final design.
As always, we emphasize that while we may not be seasoned professionals, our dedication to the task at hand shines through in every aspect of our work. This video serves as a testament to the power of determination and DIY spirit in achieving remarkable results. However, we encourage viewers to seek professional advice before embarking on similar projects to ensure safety and optimal results.
Join us on this journey of transformation and empowerment as we continue to breathe new life into our space, one tile at a time. Stay tuned for more updates as we progress further in our renovation endeavors.
Until the next installment, remember to keep Living the Northern Life!
You can help support the channel if you Subscribe and hit the Bell notification for All updates so that you are notified when I post a new video.
We have a new Patreon account as well if you would be willing to support us this way as well.
https://www.patreon.com/livingthenorthernlife
You can also help support the channel by clicking on the links to any of the items below.
Even if you choose not to purchase any of these items we would receive a commission if you purchase any item from Amazon within 24 hours of clicking on any link below.
Amazon Affiliate Link
Canada: https://amzn.to/31AufV8
USA: https://amzn.to/34HXNT2
9 inch Chainsaw Tooth Brush Blade
Canada: https://amzn.to/2CQJPm7
USA: https://amzn.to/2ECFlQB
0:00 Intro
0:29 Plans
10:00 Closing Remarks
11:00 Outro
47
views

Replacing our Old Shower - Part 3 - Installing Concrete Board & RedGard
In this episode, Replacing our Old Shower - Part 3 - Installing Concrete Board & RedGard, we remove our old corner show and build a new one starting with the concrete base.
We used 9.5 bags of concrete to build the base. It's heavy but it's in our basement on the concrete floor.
Join us as we start building our new corner shower.
Until the next one, keep Living the Northern Life!
Amazon Link
Canada: https://amzn.to/49S3mNe
USA: https://amzn.to/49TFARa
You can help support the channel if you Subscribe and hit the Bell notification for All updates so that you are notified when I post a new video.
We have a new Patreon account as well if you would be willing to support us this way as well.
https://www.patreon.com/livingthenorthernlife
You can also help support the channel by clicking on the links to any of the items below.
Even if you choose not to purchase any of these items we would receive a commission if you purchase any item from Amazon within 24 hours of clicking on any link below.
Amazon Affiliate Link
Canada: https://amzn.to/31AufV8
USA: https://amzn.to/34HXNT2
9 inch Chainsaw Tooth Brush Blade
Canada: https://amzn.to/2CQJPm7
USA: https://amzn.to/2ECFlQB
0:00 Intro
0:10 Plans
1:03 Showing you the End Product
1:40 Cutting ther Concrete Board
3:35 Instaling the First Concrete Board
5:33 Installing the Schluter Products
8:40 Applying RedGarud
11:26 Closing Remarks
12:39 Outro
53
views
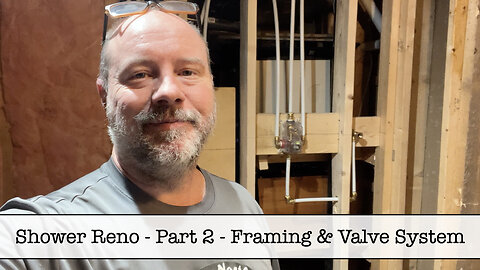
Replacing our Old Shower - Part 2 - Framing & Valve System
In this episode, Replacing our Old Shower - Part 2 - Framing & Valve System, we've removed our old corner show and build a new one starting with the concrete base.Now it's time to install the new framing and get the new valve, handheld and shower head PEX installing
Join us as we start building our new corner shower.
Until the next one, keep Living the Northern Life!
Amazon Link
Canada: https://amzn.to/49S3mNe
USA: https://amzn.to/49TFARa
You can help support the channel if you Subscribe and hit the Bell notification for All updates so that you are notified when I post a new video.
We have a new Patreon account as well if you would be willing to support us this way as well.
https://www.patreon.com/livingthenorthernlife
You can also help support the channel by clicking on the links to any of the items below.
Even if you choose not to purchase any of these items we would receive a commission if you purchase any item from Amazon within 24 hours of clicking on any link below.
Amazon Affiliate Link
Canada: https://amzn.to/31AufV8
USA: https://amzn.to/34HXNT2
9 inch Chainsaw Tooth Brush Blade
Canada: https://amzn.to/2CQJPm7
USA: https://amzn.to/2ECFlQB
0:00 Intro
0:10 Plans
0:22 Start installing the Framing
6:01 The Amazon Valve System
7:40 Installing better Screws
10:00 The Valve has a Level
13:38 The Pex Pipe Tool
14:10 Pressure Testing the System
14:55 Closing Remarks
16:02 Outro
86
views

Replacing our Old Shower - Part 1 - The Concrete Base
In this episode, Replacing our Old Shower - Part 1 - The Concrete Base, we remove our old corner show and build a new one starting with the concrete base.
We used 9.5 bags of concrete to build the base. It's heavy but it's in our basement on the concrete floor.
Join us as we start building our new corner shower.
Until the next one, keep Living the Northern Life!
You can help support the channel if you Subscribe and hit the Bell notification for All updates so that you are notified when I post a new video.
We have a new Patreon account as well if you would be willing to support us this way as well.
https://www.patreon.com/livingthenorthernlife
You can also help support the channel by clicking on the links to any of the items below.
Even if you choose not to purchase any of these items we would receive a commission if you purchase any item from Amazon within 24 hours of clicking on any link below.
Amazon Affiliate Link
Canada: https://amzn.to/31AufV8
USA: https://amzn.to/34HXNT2
9 inch Chainsaw Tooth Brush Blade
Canada: https://amzn.to/2CQJPm7
USA: https://amzn.to/2ECFlQB
0:00 Intro
0:10 Plans
0:41 Using the Laser Level
2:03 Starting the Base Framing
4:42 Schluter Drain Package
6:19 Starting Concrete
8:35 Removing the Base Framing
9:11 Closing Remarks
10:51 Outro
48
views
1
comment

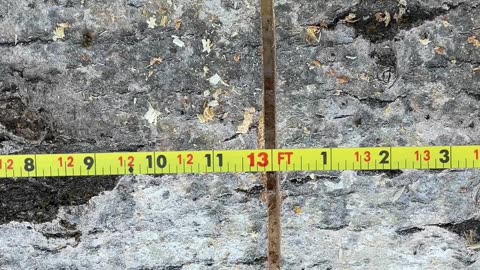
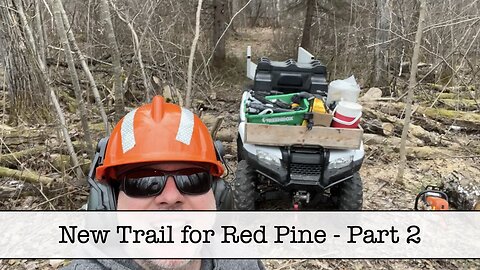
Making the Red Pine Trail - Part 1
We're getting closer to being able to build the house and we are Making the Red Pine Trail - Part 1
Until the next one, keep Living the Northern Life!
You can help support the channel if you Subscribe and hit the Bell notification for All updates so that you are notified when I post a new video.
We have a new Patreon account as well if you would be willing to support us this way as well.
https://www.patreon.com/livingthenorthernlife
You can also help support the channel by clicking on the links to any of the items below.
Even if you choose not to purchase any of these items we would receive a commission if you purchase any item from Amazon within 24 hours of clicking on any link below.
Amazon Affiliate Link
Canada: https://amzn.to/31AufV8
USA: https://amzn.to/34HXNT2
9 inch Chainsaw Tooth Brush Blade
Canada: https://amzn.to/2CQJPm7
USA: https://amzn.to/2ECFlQB
0:00 Intro
0:10 Plans
7:20 Closing Remarks
8:45 Outro
34
views
Do You Do THis?
Until the next one, keep Living the Northern Life!
You can help support the channel if you Subscribe and hit the Bell notification for All updates so that you are notified when I post a new video.
We have a new Patreon account as well if you would be willing to support us this way as well.
https://www.patreon.com/livingthenorthernlife
You can also help support the channel by clicking on the links to any of the items below.
Even if you choose not to purchase any of these items we would receive a commission if you purchase any item from Amazon within 24 hours of clicking on any link below.
Amazon Affiliate Link
Canada: https://amzn.to/31AufV8
USA: https://amzn.to/34HXNT2
9 inch Chainsaw Tooth Brush Blade
Canada: https://amzn.to/2CQJPm7
USA: https://amzn.to/2ECFlQB
48
views
2
comments
Fire Pit Lunch with Katie
Katie joins me and have a Fire Pit Lunch at the property.
Until the next one, keep Living the Northern Life!
You can help support the channel if you Subscribe and hit the Bell notification for All updates so that you are notified when I post a new video.
We have a new Patreon account as well if you would be willing to support us this way as well.
https://www.patreon.com/livingthenorthernlife
You can also help support the channel by clicking on the links to any of the items below.
Even if you choose not to purchase any of these items we would receive a commission if you purchase any item from Amazon within 24 hours of clicking on any link below.
Amazon Affiliate Link
Canada: https://amzn.to/31AufV8
USA: https://amzn.to/34HXNT2
9 inch Chainsaw Tooth Brush Blade
Canada: https://amzn.to/2CQJPm7
USA: https://amzn.to/2ECFlQB
77
views

Code 1299 on 2017 Ford Escape
DISCLAIMER:
This video is for entertainment purposes only and is only meant to show you how we did this job and is in no way a how to. We are not mechanics and are not giving mechanical advice.
YOU WILL NEED TO CLEAR THE CODES BEFORE THE CAR WILL COME OUT OF "LIMP MODE"
Re-evaluate your life choices before proceeding with this task. :)
This was one of the most difficult jobs we've done so far on this channel and I'm not sure that I would do this task again on this 2017 Ford Escape.
It took about 3.5 hours to do this task as there is no room to work on it at all.
The struggle was to get the old sensor unclipped and to try and re-install a bolt that I was not able to do.
Getting to the sensor requires that the air intake be fully disconnected and removed so take some pictures if this doesn't come naturally.
We bought the part directly from Ford and was about $23 Canadian.
Until the next one, keep Living the Northern Life!
0:00 Intro
0:10 Plans
10:00 Closing Remarks
11:00 Outro
You can help support the channel if you Subscribe and hit the Bell notification for All updates so that you are notified when I post a new video.
We have a new Patreon account as well if you would be willing to support us this way as well.
https://www.patreon.com/livingthenorthernlife
You can also help support the channel by clicking on the links to any of the items below.
Even if you choose not to purchase any of these items we would receive a commission if you purchase any item from Amazon within 24 hours of clicking on any link below.
Amazon Affiliate Link
Canada: https://amzn.to/31AufV8
USA: https://amzn.to/34HXNT2
9 inch Chainsaw Tooth Brush Blade
Canada: https://amzn.to/2CQJPm7
USA: https://amzn.to/2ECFlQB
55
views