How I Made My St Patricks Gnome
I love Gnomes, but I do not have one for my St Patricks Day decor! So I gathered some of my supplies and in about 15 minutes I have this cute little shelf sitter!
Supplies I Used for my St Patricks Gnomes
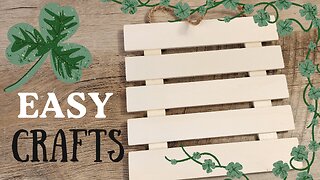
Paper Mache Cone: I used a 12″ tall cone
White Faux Fur
Adult sized socks: I had unused St Patricks socks I purchased from Dollar Tree last year
Wood Beads
Optional: St Patrick picks and ribbon or fabric. I found my Shamrock picks at Dollar Tree and used ribbon and fabric I had on hand.
Hot glue and glue gun
Scissors
ASSEMBLING MY ST PATRICK GNOMES
Now to be honest, I wasn’t sure how I was going to craft my Gnomes.
Once I had my supplies gathered, I realized the fur fabric I had picked out was not going to wrap all the way around the bottom third of my paper mache cone.
I cut my sock so I had the long part, the part that goes over the calf in once piece, for my Gnomes hat.
Then I cut and disassembled the foot part of the sock for the backside of my Gnome.
I cut the toes section off, and then I cut the other side so this part of the sock was a rectangle shape.
It might be easier for you to check my video below to see how I did this!
Then I grabbed my favorite glue gun and glued the rectangle piece to the bottom third part of the cone.
This will be the backside.
Next I roughly measured my faux fur and started cutting the fur from the backside.
Cutting the faux fur from the back is a little less messy and you’re not cutting most of the fur that we are wanting for our gnome.
Then I hot glued the fur onto my Gnome, over lapping the sock fabric.
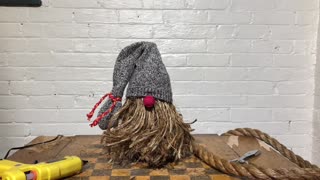
Next I placed the long part of the sock on my Gnomes “head”.
But before I did, I cut off the black end of the sock, since I didn’t really want that showing.
I kind of wish I left that alone, so I added some fabric ribbon over this area so the rough edges of the sock were hidden.
And it actually looks cute!
NOW I ADDED MY NOSE!
I parted the fur in the middle, the best I could, added some hot glue and placed my wood nose in the middle of the parted area.
I cute three small rectangle faux fur for eyebrows and mustache.
This step isn’t really necessary but I wanted to add a little more hair in these areas.
Next I added some fabric strips, leftover from my Messy Bows supplies and tied the top of my Gnomes hat.
For the final embellishment, I grabbed a Shamrock pick from a package I bought from Dollar Tree.
I broke off part of the pick, found a spot where I wanted to hot glue the pick, and also added a little more where I wanted the Shamrock to stay, up by the hat and that was it!
-
 19:19
19:19
MPDtribe
3 years ago $0.01 earnedEasy DIY Valentine Day Decor
2941 -
 32:34
32:34
Julie's Wreath Boutique
2 years agoHow to Make a Leprechaun Wreath | How to Make a St. Patrick's Day Wreath | St. Patrick's Day Decor
8 -
 9:22
9:22
Dave's Wreaths and Things
1 year ago $0.02 earnedSt Patrick's Day Wreath DIY - How to Make a Tablecloth Wreath
4 -
 4:42
4:42
Cardmaking with Cathy
2 years agoLucky Friend St. Patrick's Day Card
44 -
 15:54
15:54
Crafting: Lady Red Crafting
3 months ago $0.02 earnedLucky Charms Galore: Top Shamrock DIY Crafts for St. Patrick's Day Celebration ☘️
18 -
 3:23
3:23
Mystic Knotwork
2 years agoHow to make a Christmas Gnome
29 -
 4:49
4:49
MPDtribe
3 years agoMy DIY Mini Wooden Risers
91 -
 18:57
18:57
KristieMarcotte
2 years agoJaded Blossom | St. Patrick's Day release
64 -
 17:40
17:40
Wolf Maiden
1 year agoHow to make 3 LARP Outerwear Pieces made from Curtains!
80 -
 19:15
19:15
DeborahKaye
1 year agoChristmas Gnome Bottle Art Decor | Easy Painting Tutorial
21