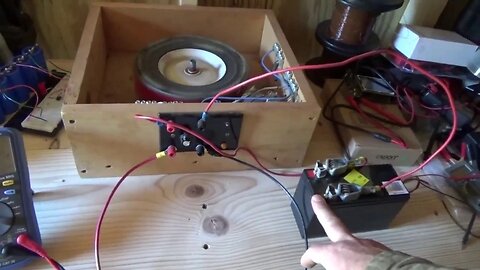
Bedini Motor Running 19 LED Lamps ~ Lower Current & Higher Charging
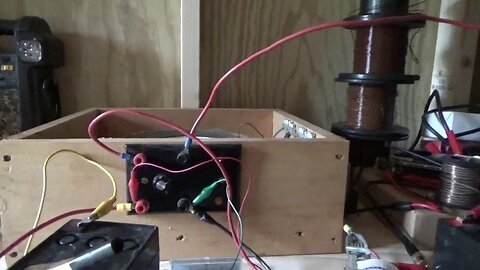
I connected 19 LED lamps and 2 incandescent lamps to the output of my Bedini motor. This gave me free light, reduced input current and increased charging output. Read full article: http://www.thedoityourselfworld.com/articles/article.php?id=11445
I wanted to experiment with the output of the Bedini motor and see what I could do with it besides charging batteries.
I put an incandescent light bulb in series with the output to the charging battery and got light. Then I added another but the light got a bit dimmer.
So I tried an LED light bulb to see what would happen. These are 12 volt LED light bulb replacement for RVs and campers. I have a bunch left over from my camper living days.
The LED light up. So I added more. And more. And more until I ran out of LED light bulbs. In the end I had 19 LED lights glowing and 2 incandescent lights all at the same time.
The lights are in parallel with one another and the entire set is in series with the output battery. This is all on the positive side of the charging battery.
I am going to run more experiments later and see what else I can get using my old Bedini motor.
I did notice though that with the lights connected in series with the battery, the charge on the battery was increased and the input current dropped a little bit. The motor also ran a little bit slower with the lights going.
So the motor slows down, input current is decreased, output charge is increased and I have free light.
It seems that by using lights in series with the output battery I can actually increase the charging output.
This is pretty cool.
Thanks for watching. Please Subscribe & follow my daily videos.
Troy
http://www.thedoityourselfworld.com
http://www.theoffgridproject.com
Note: Copying this video, in part or in full, is a violation of copyright unless the user has express permission from the owner. Violation of this copyright will be pursued to the fullest extent of the law.
45
views
Holiday At The Cabin With Family & Garage Sale Find
Our family is up to the cabin for the holiday weekend and we are having a good time. Plus the garage sales are on and we found some good things.
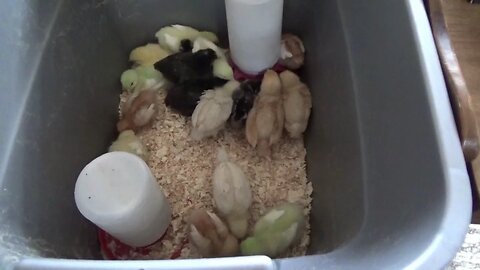
I got a large dog carrier at a garage sale for the chicks. Now they have a lot of space in the living room while they are growing up the first couple weeks.
Chicks need more heat in the first weeks until they feather out and can produce their own warmth. So we raise our birds inside our home with great success and reduced energy used.
Most people use a heat lamp during this period but those take a lot of power. I figure we have the house heated anyway so we raise the birds inside.
The dog kennel gives them a lot of space and has a plastic bottom to keep the dirt from going onto the carpet. Some cardboard around the edges keeps the litter from falling out.
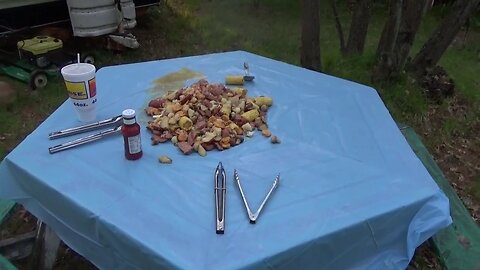
At the cabin we had our traditional family meal. This is made with sausage, onions, shrimp, potatoes, corn on the cob, beer, water and seasonings cooked over a turkey roaster.
Then the entire pot is dumped onto the table and everyone eats with their hands. It messy, but fun and tastes so good.
In the evening I got my traditional beautiful sunset at the cabin as things were winding down for the night. The frogs were chirping happily.
Thanks for watching. Please Subscribe & follow my daily videos.
Troy
http://www.thedoityourselfworld.com
http://www.theoffgridproject.com
Note: Copying this video, in part or in full, is a violation of copyright unless the user has express permission from the owner. Violation of this copyright will be pursued to the fullest extent of the law.
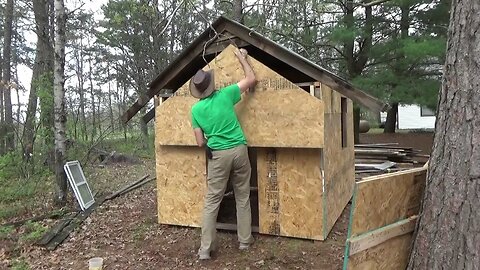
Got Free Truckload Of OSB & Putting Sheathing On Chicken Coop
I got a full truck load of free OSB sheathing and immediately got to work on my new chicken coop.
I removed the siding I was putting on and decided to put on the sheathing first. Then I will use tar paper next, followed by the pine wood siding.
I worked right off the bed of the truck, measuring and cutting the sheathing as I worked rather than moving the wood twice.
In the end I used all but one of the 7 full sheets and I used two of the halves. I still have a full sheet left over plus a bunch of half sheets.
I will put nesting boxes for the hens plus two loft areas. One for storage and one for a chicken brooder. This will be an insulated chicken brooder up near the ceiling on one end. This way I can keep the chicks in their pen from the start.
I am feeling very good about the new chicken coop. I think this is the best construction I ever did.
It is all nice and square too. This was easy to since the chicken coop is just as long as a sheet of OSB.
Inside I will use some of the OSB for storage areas and the lofts. I will have a lift up cover for the trash cans which hold the chicken feed. This will keep the chickens from nesting on top of my cans and making a mess of them.
I ripped off the long boards from the roof too and replaced them with OSB. Then I put tar paper on the roof to water proof it until I get the roofing in place.
Thanks for watching. Please Subscribe & follow my daily videos.
Troy
http://www.thedoityourselfworld.com
http://www.theoffgridproject.com
Note: Copying this video, in part or in full, is a violation of copyright unless the user has express permission from the owner. Violation of this copyright will be pursued to the fullest extent of the law.
15
views

Checking Soil Acid Levels With PH Litmus Paper Test Strips
Testing our soil PH level (acid level) with cheap PH test strips. Read full details here: http://www.thedoityourselfworld.com/articles/article.php?id=11444
Thanks for watching. Please Subscribe & follow my daily videos.
Troy
http://www.thedoityourselfworld.com
http://www.theoffgridproject.com
Note: Copying this video, in part or in full, is a violation of copyright unless the user has express permission from the owner. Violation of this copyright will be pursued to the fullest extent of the law.
4
views
Building Chicken Coop While Melanie Sews With Cloth Scraps
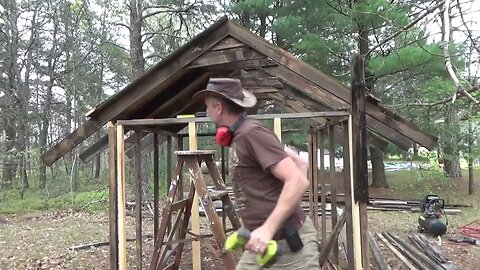
I am making good progress on building the large walk in chicken coop while Melanie is sewing pillow cases inside using fabric scraps.
I have been working in the rain so I did not have my camera out most of the day. We had a frost in the night so planting is still out of the question here.
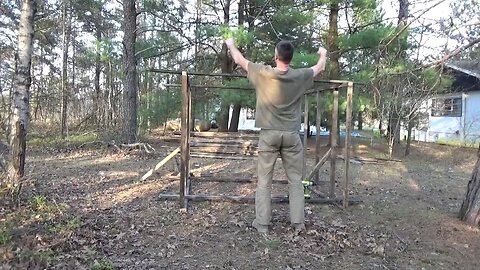
I got the front wall framed in where the chicken coop door is going to be. I used heavier lumber for this part.
I also managed to get the roof framed in. This was tricky but using things I learned from my viewers through the years it went up well enough.
I took the plywood deck from out behind the house and put two pieces up on the roof. This makes it solid and sturdy. I will put up tar paper and roofing when I am finished with the sheathing.
I also framed in one window. I have to get the other side done tomorrow.
I put on some of the siding using rough cut pine lumber I got from the local lumber mill.
This is going to be a very nice chicken coop able to hold a lot of birds.
Inside Melanie is getting better with the sewing machine. She is learning to sew in patterns. She worked all day making pillow cases out of scrap materials. She is even sewing in leaf and flower patterns using the sewing machine.
She has talents that is for sure.
Thanks for watching. Please Subscribe & follow my daily videos.
Troy
http://www.thedoityourselfworld.com
http://www.theoffgridproject.com
Note: Copying this video, in part or in full, is a violation of copyright unless the user has express permission from the owner. Violation of this copyright will be pursued to the fullest extent of the law.
18
views
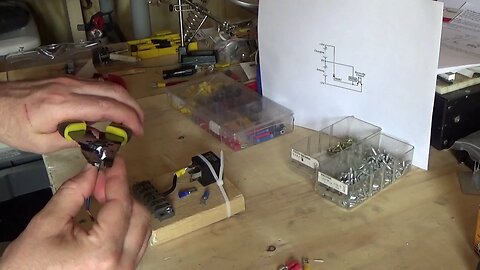
How To Make Mini Bedini Style Circuit Using Car Relay ~ Imhotep Variant
How to make a radiant energy Bedini style circuit with a car relay. Read full article and details: http://www.thedoityourselfworld.com/articles/article.php?id=11443
Thanks for watching. Please Subscribe & follow my daily videos.
Troy
http://www.thedoityourselfworld.com
http://www.theoffgridproject.com
Note: Copying this video, in part or in full, is a violation of copyright unless the user has express permission from the owner. Violation of this copyright will be pursued to the fullest extent of the law.
15
views
Back To Work On The Homestead
We are back to work on the homestead as usual now after our long road trip to New York and back. Some packages arrived. I am working on the chicken coop. And we bought chicks to start our new flock in Michigan.
We had to go to the hospital again for Melanie so on the way back home we picked up some chicks. We got 6 broiler (meat) chickens as an experiment this time. We have never tried broilers in the past but we hope to have cleaner food this year so we will see how it goes.
The broilers cost only $1.99 each, which is pretty cheap. Each bird will cost about $2.40 in food by the time it is ready for the table. This puts a bird cost at about $4.49 from egg to table for a partially free range bird. This is equal to a whole chicken on sale at the grocery store.
We also got a mix of other chickens to start out egg laying flock again in Michigan. In Pine Bush we sold all of our birds before we left because it was not going to be possible to bring them with us.
I found a free table saw table converted into a work bench out on the road side on the way home. I picked it up and brought it home. This will be a perfect place for assembling wood projects on a flat surface.
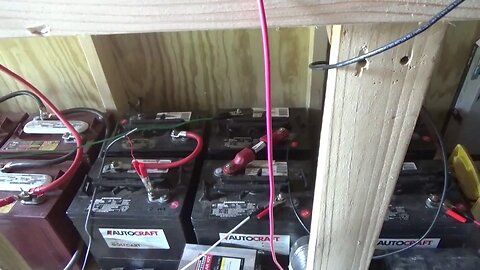
I am working in the off grid electronics shop trying to restore lead acid batteries for our soon to be fully off grid homestead.
I spent a considerable amount of time cleaning out the wood shop. Since our return from New York I have a lot of things to sort and put away. I hope to have the wood shop set up and fully functional by the end of this week.
Out back I am working on the chicken coop which I hope to finish soon. The chicken coop will be a walk in sized pen for the birds with a built in brooder for chicks to grow up in.
We also got some plants on sale in town. I planted some grape vines and raspberries along the road edge as a living hedge row.
Melanie is planting herbs that she brought back with us from our old homestead. She is making a nice herb garden using rocks as a border.
Some packages arrived in the mail as well. One contained a box full of hardware from one of our viewers. This is very much appreciated since I am always running out of screws. Thank you very much!!
ThruNite sent me another one of their fine products to try out. You can find ThruNite here:
Save $10 by shopping on ThruNite Direct until May 31st:
http://www.thrunite.com
Shopping on Amazon:
https://www.amazon.com/dp/B06XWXVZH7/
Thanks for watching. Please Subscribe & follow my daily videos.
Troy
http://www.thedoityourselfworld.com
http://www.theoffgridproject.com
Note: Copying this video, in part or in full, is a violation of copyright unless the user has express permission from the owner. Violation of this copyright will be pursued to the fullest extent of the law.
10
views

The final road trip to the Old Homestead
Melanie and I finally made it back to the Old off-grid Homestead in Pine Bush where we picked up a lot of the things we had forgotten or missed on the main move to our new home in Michigan.
We pushed through hard got there in one day packed on the day we arrived and headed out that same day to save time and get back to our new home.
Now we are Closing one chapter in our lives and ending our time in New York and moving forward with our new home in Michigan.
We got just about everything we wanted things we forgot like my impact driver air compressor when turbine and we got a full heavy load on my old truck.
New people now live at the homestead I have nothing more to do with Pine Bush and a friend of mine is cleaning up anything that we left behind that's a new owners do not want so all is well and we left on good terms with everybody around the old property.
HOT Day At The Homestead But Lots Of Activity
It was about 85 degrees today at the homestead. Inside the house it got quite hot. But we kept on working, just out of the heat.
I was hoping to work more in the garden today but it was way too hot for me.
Melanie was baking in the kitchen to top it off so it got very hot inside the house. That kept me out in my shop most of the time today where it was not as hot.
I am working on restoring lead acid batteries for our off grid living. We plan to be fully off the grid and this means that lead acid batteries are going to be very important to us.
I am also working on a vehicle battery replacement using supercapacitors. The super capacitors have about 1 million cycles life while a battery gets about a thousand. This is a huge difference.
If I can get supercapacitors to replace a car battery for me then a person would potentially have a lifetime battery for the price of one single battery.
Melanie's baking turned out very well today. She made the best pizza ever plus bread and muffins.
I received a package in the mail from Tacklife containing a rotary tool kit. This is a very nice looking kit with more accessories than you usually get out of the box.
You can find Tacklife on Amazon here: http://amzn.to/2qvJgFE
Thanks for watching. Please Subscribe & follow my daily videos.
Troy
http://www.thedoityourselfworld.com
http://www.theoffgridproject.com
-------------------------------------------------------------------------------------------------------------
CHECK OUT OUR OTHER CHANNELS:
Off Grid Homesteading With Melanie: https://www.youtube.com/channel/UCFRwlShDuXP5WXdtXV15rAQ
The Do It Yourself World Electronics: https://www.youtube.com/channel/UCMIqpFAOBkppGkgrSC11p6Q
TR Tech Tactical & Survival: https://www.youtube.com/channel/UChPdsvwahC2wh8lvWs6ud4g
-------------------------------------------------------------------------------------------------------------
Join our Patreon account for special videos and footage, prizes, gifts and more: https://www.patreon.com/TheDoItYourselfWorld
Watch, comment and earn money on my steem channel:
https://steemit.com/@thediyworld
Join my TopBuzz channel and share your ideas and comments:
https://www.topbuzz.com/user/6477165683338642441
-------------------------------------------------------------------------------------------------------------
Note: Copying this video, in part or in full, is a violation of copyright unless the user has express permission from the owner. Violation of this copyright will be pursued to the fullest extent of the law.
44
views

Summary Of Our Day At The Homestead
It was a hot day yesterday so Melanie and I worked in the Chalet preparing for garage sales coming up. And I cleaned out the garage where it was cooler.
I was hauling stuff out of the garage that we did not need while Melanie was clearing out the two homes. We plan to turn the chalet living room into a walk in garage sale floor for the summer months.
We are setting up tables with stuff for sale.
I worked a lot out in the cooler garage, taking stuff to the chalet.
Many of you will remember that we walked in to a full garage and two homes full of stuff. Much of the things we do not need so we will sell it to help offset the cost of our move halfway across the country.
It was in the 80s outside so working in the garage and chalet were a relief for us as well.
Our water heater in the trailer blew out on us this morning. The wires leading into the water heater started on fire. The circuit breaker never blew. It is a miracle that we were home and not in bed when this happened.
There was a lot of smoke filling the bedroom by the time I got it all put out.
I have no knowledge of these things so I have no idea why it started to burn up on top. All I did a few weeks ago is change out the heating element that was bad. This still looks perfectly fine.
I am hoping someone out there can tell me what may have gone wrong and how to fix it.
Thanks for watching. Please Subscribe & follow my daily videos.
Troy
http://www.thedoityourselfworld.com
http://www.theoffgridproject.com
Note: Copying this video, in part or in full, is a violation of copyright unless the user has express permission from the owner. Violation of this copyright will be pursued to the fullest extent of the law.
6
views
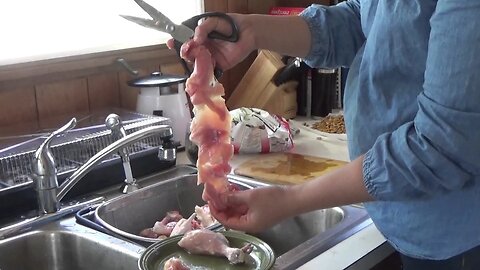
Melanie Shows How To Make Chicken Thigh Filets For The BBQ
Melanie shows us how she turns normal chicken pieces into awesome fillets for the BBQ using just a pair of kitchen scissors.
Melanie takes the chicken in hand and simply cuts close to the bone. She slides the scissor point along the bone and then makes a cut. She turns the bone around and cuts the meat off the bone. This is a little bit like making fish fillets.
But now she does something pretty cool. Melanie takes the meat in her hand and using the scissors she makes some cuts to open the meat up into a longer, flat filet.
This allows the meat to cook through in minutes on the grill. This saves gas and time. It also allows the flavor from marinating to soak through the meat easier and faster.
The meat prepared in this way is much more flavorful and is cooked very quickly.
Melanie keeps the bones for making natural broth rather than using store bought broth with artificial ingredients and preservatives.
Thanks for watching. Please Subscribe & follow my daily videos.
Troy
http://www.thedoityourselfworld.com
http://www.theoffgridproject.com
-------------------------------------------------------------------------------------------------------------
CHECK OUT OUR OTHER CHANNELS:
Off Grid Homesteading With Melanie: https://www.youtube.com/channel/UCFRwlShDuXP5WXdtXV15rAQ
The Do It Yourself World Electronics: https://www.youtube.com/channel/UCMIqpFAOBkppGkgrSC11p6Q
TR Tech Tactical & Survival: https://www.youtube.com/channel/UChPdsvwahC2wh8lvWs6ud4g
-------------------------------------------------------------------------------------------------------------
Join our Patreon account for special videos and footage, prizes, gifts and more: https://www.patreon.com/TheDoItYourselfWorld
Watch, comment and earn money on my steem channel:
https://steemit.com/@thediyworld
Join my TopBuzz channel and share your ideas and comments:
https://www.topbuzz.com/user/6477165683338642441
-------------------------------------------------------------------------------------------------------------
Note: Copying this video, in part or in full, is a violation of copyright unless the user has express permission from the owner. Violation of this copyright will be pursued to the fullest extent of the law.
18
views
Road Trip ~ Heard Baby Heartbeat ~ Restoring Batteries
Yesterday Melanie had another checkup at the hospital. We got some good stuff on the way home. I worked in the off grid electronics lab the rest of the day.
At the hospital Melanie had her checkup and we got to listen to the heartbeat of the baby. It was a strange underwater type of sound. It was pretty cool to be able to hear this. It makes it more real for us somehow.
They said that Melanie is very healthy and we should keep up what we are doing in our lifestyle.
On the way back from the hospital we stopped at Habitat for Humanity and found two awesome windows for our chicken coop. These were a pair of matching windows that we got for only $5 each. This was a great deal. I cant make windows myself for this price.
Inside the windows I will use hardware cloth as window screens in order to prevent predators from getting to the birds.
I will build these windows into the frame of our chicken coop.
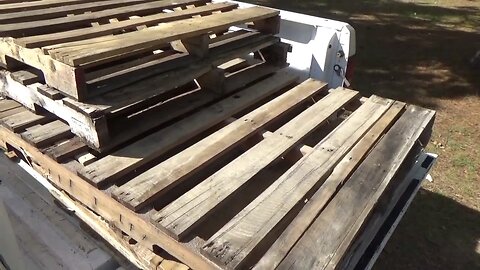
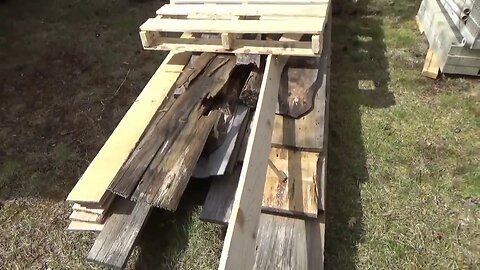
Later we also found some free wood pallets and chose the best ones to take home. The rest someone will take home to burn for heat. I am collecting pallets to finish my work shop wall paneling.
I have been working on the capacitor starting battery replacement for my truck. If I get it working well this can be a lifetime battery replacement for a vehicle.
I am also running the Bedini motor and Quanta Q3 generator which are restoring lead acid batteries in my off grid electronic lab.
Thanks for watching. Please Subscribe & follow my daily videos.
Troy
http://www.thedoityourselfworld.com
http://www.theoffgridproject.com
Note: Copying this video, in part or in full, is a violation of copyright unless the user has express permission from the owner. Violation of this copyright will be pursued to the fullest extent of the law.
17
views
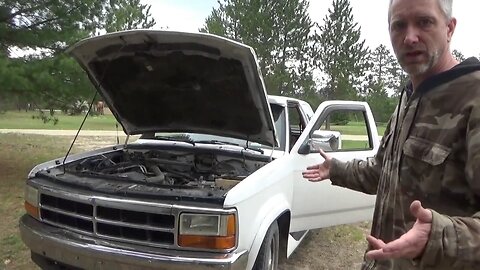
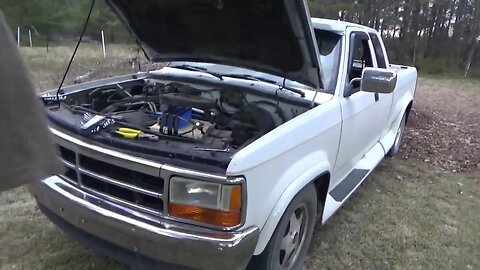
Starting & Driving My Truck With SuperCapacitor Battery Replacement
I built a wood box to house the supercapacitor battery replacement and went on a day long road trip to try it out.
I built a box and put on real battery terminals. Then I mounted it into my truck to prepare for a road trip. This is the ultimate test. Driving my truck with capacitors instead of a starting battery for an entire day on the road.
The truck fires right up stronger than with a battery. This is the first thing that I noticed after installing this battery replacement.
With supercapacitors you do not have to run the vehicle long in order to fully charge them back up. These are fully charged within a minute or two when the vehicle is running.
I can start the vehicle. Shut it off and start it back up again with no problem. Supercapacitors charge up immediately.
We drove down to visit my family for Mothers day. We drove the truck around town for a couple hours as well. We must have started and stopped the vehicle about 15 to 20 times during our day of driving and visiting people.
The capacitors never failed to start the vehicle. Only one time I had a scare when I let off the starter switch before the vehicle was running. It took three tries to get the truck to fire up. At that time it was turning slowly and I was afraid it would not start but it did.
We drove with headlights, windshield wipers and heater going most of the day with no problem. The truck performed well and the voltage remained steady all day.
The supercapacitor battery replacement worked well today.
Thanks for watching. Please Subscribe & follow my daily videos.
Troy
http://www.thedoityourselfworld.com
http://www.theoffgridproject.com
Note: Copying this video, in part or in full, is a violation of copyright unless the user has express permission from the owner. Violation of this copyright will be pursued to the fullest extent of the law.
1
view
Starting Truck On SuperCapacitors ~ Gardening ~ Chicken Coop Build
I have made a battery replacement for my truck using supercapacitors. We are preparing the soil for an organic garden this year. I am building a large walk in chicken coop using reclaimed lumber.
I have been hauling truck loads of composted leaf mulch for days now. I figure that six truck loads will cover our first garden space about half an inch to an inch deep. This will give nutrients to the soil for our plants to grow in.
Out in the off grid electronics lab I have been working a lot recently restoring lead acid batteries and soldering supercapacitors.
I am using both the Quanta Magnetics Q3 Charge Accelerator and the Bedini motor to restore old badly sulfated lead acid batteries. I charge a battery up on one device and use that battery to power the other device. I can cycle the batteries in this way until they gain in usable energy.
I have a large supercapacitor bank which has about 400 Farad capacity at 15 volts DC. I will use this capacitor bank to run my Quanta Q3 generator and for off grid experiments.
I have also been working on a replacement for lead acid batteries in vehicles. This will replace the starting battery in a vehicle. The advantage of supercapacitors is that they are not affected by cold or heat like a standard lead acid battery. They are not harmed by deep discharging or leaving them discharged for any amount of time. And their potential life span is much longer than that of a lead acid battery.
I used some jumper cable leads with crimp on end connectors to bolt into a pair of battery terminals. Then I put this into my truck in place of the starting battery.
At first I had problems with my truck battery terminals. They are badly in need of being replaced. But I got them connected to the capacitor bank.
When I got the connections set up properly the truck started right up. The starter motor ran strong too. You can really hear the difference in power using supercapacitors instead of a starting battery.
Out back I am still working on the chicken coop. I am using old lumber to build this chicken coop. I am making it large enough for us to walk into it and to hold a large flock of birds.
Up in the top near the back I will have a chicken brooder built in where I can raise chicks as needed. This will save us space and will allow us to raise the birds in their house from egg to adult.
Thanks for watching. Please Subscribe & follow my daily videos.
Troy
http://www.thedoityourselfworld.com
http://www.theoffgridproject.com
Note: Copying this video, in part or in full, is a violation of copyright unless the user has express permission from the owner. Violation of this copyright will be pursued to the fullest extent of the law.
21
views
Organic Garden Work & Building Walk In Chicken Coop
I am hauling composted leaf mulch to amend our organic garden soil. I started building a walk in chicken coop using scrap lumber.
Thanks for watching. Please Subscribe & follow my daily videos.
Troy
http://www.thedoityourselfworld.com
http://www.theoffgridproject.com
Note: Copying this video, in part or in full, is a violation of copyright unless the user has express permission from the owner. Violation of this copyright will be pursued to the fullest extent of the law.
Hauling Compost For Garden ~ Lumber Haul ~ Cleaning Up
My camera has been glitching out so I missed some footage but I got a good lumber yard haul as well as compost for our new organic garden. And we are cleaning up in front of our new home. Read full article here: http://www.thedoityourselfworld.com/articles/article.php?id=11442
We are planning to have an organic garden this year in order to grow enough food to feed our family through the winter. We are also going to raise chickens for meat and eggs. Along with hunting and fishing we hope to store up enough food to last us an entire year and reduce our food dependency on the grocery stores.
I got a nice lumber yard haul for building our chicken coop. Some of the wood was in better shape and will be used for building shelving and other things for our new homestead.
I unloaded the chicken coop wood onto pallets where the chickens will be living. Then I put the nice lumber on pallets by the off grid wood shop.
I hauled two truck loads of composted leaves as well today. I managed to get one load spread out over the garden. I see that it will take another 5 loads to get a half inch thick layer on the garden.
We plan to have an organic garden this year using all natural materials. The composted leaves tilled into the soil will help to add fertilizer to the garden.
After sitting a few days I will do a PH test to see how acidic the soil is. I will amend the soil with lime as needed.
Then we can start planting in our new homestead garden.
Thanks for watching. Please Subscribe & follow my daily videos.
Troy
http://www.thedoityourselfworld.com
http://www.theoffgridproject.com
Note: Copying this video, in part or in full, is a violation of copyright unless the user has express permission from the owner. Violation of this copyright will be pursued to the fullest extent of the law.
2
views
Deep Freeze Killed Plants ~ Off Grid Electronics Lab
We had a deep freeze which killed off some of our plants. I am working in my off grid electronics lab.
It got down to 27 degrees F the other night. In the morning I walked around to inspect the damage to my fruits, flowers and vegetables.
Some of the flowers sustained a little bit of damage. I am not sure about the bulbs yet. The potatoes we planted are killed off entirely. Our apple trees seem to have suffered some flower damage but I will not be sure yet for a few days.
I tried to wrap the apple trees with plastic to protect them from the freezing temperatures but the wind was very strong that night and tore it all up right away.
I will have to wait and see how things look in a while.
I worked a lot in my off grid electronics lab today. I am cleaning it up and setting up equipment.
I am also running my Bedini motor now to restore the old golf cart batteries from my motor home. The Quanta Q3 charge accelerator is now charging one pair of batteries. The Harbor Freight solar panel kit is charging the good set of batteries. And the Bedini motor is charging the third set.
The second output of the Quanta Q3 is charging an old badly sulfated UPS battery.
I am also running super capacitor experiments in my off grid electronics lab.
I started planting starter trays with seeds for our garden this year. We cannot plant until after Memorial day around here due to the risk of frost. But we hope to at least get a little bit of a head start using starter trays indoors.
I am taking good notes this year on what I plant and where so that i can keep track of our garden. I hope to keep records of everything we do this year.
In the kitchen Melanie is making all kinds of good things. She is making homemade oatmeal bread. She also made all natural strawberry cheesecake using real ingredients.
And she is cleaning and preparing some Morel mushrooms that we picked ourselves nearby.
Thanks for watching. Please Subscribe & follow my daily videos.
Troy
http://www.thedoityourselfworld.com
http://www.theoffgridproject.com
Note: Copying this video, in part or in full, is a violation of copyright unless the user has express permission from the owner. Violation of this copyright will be pursued to the fullest extent of the law.
34
views

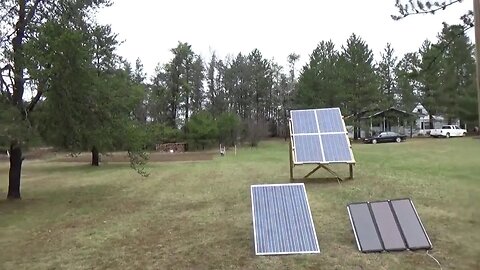
Sorting Office & Hooked Up Solar Power To The Wood Shop
I have power in the off grid wood shop!!! The off grid wood shop is now powered fully by solar panels and batteries stored in my off grid office nearby.
I first spent a good part of the day cleaning out my office. I emptied a few boxes and sorted things into their new homes. I am hoping to get my office cleaned up soon so I can get back into electronics projects.
I put down some rugs that we got with the garage when we bought the house. I had these out in the rain to be washed a few times and then dried them in the sun. After a beating with a broom they were ready to come into my office.
They will protect the floor and keep the dust down in there when I work on electronics.
I hooked up the large 3,500 watt power inverter to my battery bank using some scrap wire I got from a neighbor. I want to run the inverter up a bit higher and off the floor but for now this is all the wire I could find anywhere.
I ran a thick extension cord to the wood shop nearby and tried out my power tools. The drill press does not even put a dent in the power available through my system.
The planer is the most power hungry tool I have in the wood shop and it runs with no problem now off the solar power battery bank.
This is so exciting to now have my wood shop fully off the grid and operational.
Thanks for watching. Please Subscribe & follow my daily videos.
Troy
http://www.thedoityourselfworld.com
http://www.theoffgridproject.com
Note: Copying this video, in part or in full, is a violation of copyright unless the user has express permission from the owner. Violation of this copyright will be pursued to the fullest extent of the law.
7
views
Finishing 1 Pallet Wood Wall & Pallet Work Bench
While Melanie decorates the house and works inside I am out in the work shop putting pallet wood on the walls as paneling.
Melanie got a package in the mail with some patterns for needle point work and some hoops to make her job easier. She is really having fun with this recently.
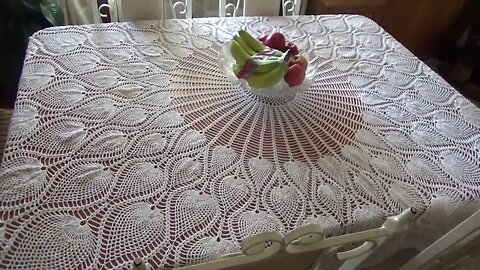
We have the table cloth that Mother Of Many Horses made for us. It is so beautiful that we hardly want to use it. I will get a clear table cloth to put over it to prevent spills.
Outside in the off grid work shop I am finishing one wall with pallet wood paneling. It takes three pallets per section to finish the wall. But I really like how it looks now.
After a hard day of work I also put in one work bench made out of a pallet. This pallet was made out of plywood so I cut it to the size I wanted and then use pallet wood runners as legs. Two pallet wood boards made cross bracing on the legs.
Thanks for watching. Please Subscribe & follow my daily videos.
Troy
http://www.thedoityourselfworld.com
http://www.theoffgridproject.com
Note: Copying this video, in part or in full, is a violation of copyright unless the user has express permission from the owner. Violation of this copyright will be pursued to the fullest extent of the law.
16
views

Sun Coffee ~ Brewing Coffee By The Power Of The Sun
I made myself a cup of coffee using the power of the sun. Read full article here: http://www.thedoityourselfworld.com/articles/article.php?id=11441
I got a submersible water heater on clearance for just a couple dollars. I immediately brought it home to see if I could make myself an off grid cup of coffee using solar energy.
I plugged the heating element into my off grid work shop solar battery bank through a power inverter.
I was surprised to see that this water heater did not use much energy at all from my solar power battery bank.
The batteries actually went from absorption mode into float mode while I made my cup of coffee. This means that I had power to burn and then some. The batteries were topped off and staying there even while I was burning energy.
It sure felt good to enjoy a cup of sun coffee in my off grid work shop.
Thanks for watching. Please Subscribe & follow my daily videos.
Troy
http://www.thedoityourselfworld.com
http://www.theoffgridproject.com
Note: Copying this video, in part or in full, is a violation of copyright unless the user has express permission from the owner. Violation of this copyright will be pursued to the fullest extent of the law.
2
views

Making Pallet Wood Paneling In My Off Grid Work Shop
I am using wood pallets to make paneling for my off grid work shop. This takes time to break down the pallets, remove nails and cut the wood to size but it is free.
Thanks for watching. Please Subscribe & follow my daily videos.
Troy
http://www.thedoityourselfworld.com
http://www.theoffgridproject.com
Note: Copying this video, in part or in full, is a violation of copyright unless the user has express permission from the owner. Violation of this copyright will be pursued to the fullest extent of the law.
Working In Off Grid Wood Shop & Office During Rainy Days
It rained for two entire days without letting up so I worked in the off grid wood shop and office.
I cleaned up the off grid wood shop and organized it some more. I picked up a shelf which my neighbor told me about and put it into my wood shop. It fits nicely in there.
I am still unpacking after the move and sorting out my equipment. I am making good progress though.
I also worked quite a bit in the off grid electronics lab and office. This is also off the grid and contains my solar battery banks and control electronics. The office will power my off grid wood shop when I am done.
In the office I have the Quanta Q3 generator slowly charging up a bank of super capacitors. These capacitors need to be brought up to a higher voltage so that my normal charger will be able to recognize them. The Quanta is perfect for this job.
I later got my old Bedini motor running as well in order to restore lead acid batteries. This old machine does a very good job at restoring old badly sulfated lead acid batteries which cannot be charged anymore by conventional chargers.
I am working on an old 12 volt battery that was down to 0.5 volts and bone dry when I got it. I had put distilled water in it and am charging it up on the Bedini motor.
I installed a cut off switch on the solar panel frame outside. This will allow me to disconnect power from the solar panels to the solar charge controller if I need to.
A rabbit was eating our new flowers so I bought some plastic tent stakes to use as electric fence wire holders. The stakes have a hole in the top of each one. This is perfect to hold the electric fence wire.
Hopefully this will stop rabbits from eating our flowers from now on.
I am also going to protect the apple trees from being eaten by rabbits and deer by using some drainage tile cut lengthwise.
Thanks for watching. Please Subscribe & follow my daily videos.
Troy
http://www.thedoityourselfworld.com
http://www.theoffgridproject.com
Note: Copying this video, in part or in full, is a violation of copyright unless the user has express permission from the owner. Violation of this copyright will be pursued to the fullest extent of the law.
54
views
ThruNite C2 18650 Power Bank & Battery Charger
ThruNite sent me their C2 18650 battery charger and power bank to try out. Read the full details here: http://www.thedoityourselfworld.com/articles/article.php?id=11440
The ThruNite C2 power bank contains a 3400 mAh 18650 battery inside which gives it a total power capacity of 12.24 Watt Hours.
This device can power your cell phone, tablet, camera and other mobile devices.
With the common 18650 battery inside you can carry spares and have unlimited power on the go.
This is also a battery charger so you can use it to keep all of your 18650 batteries topped off.
I have used this to charge up my power hungry cell phone and to power USB lighting in my off grid work shop.
I use a folding USB solar panel to keep the battery charged up in between uses for free energy while traveling.
With its rugged aircraft aluminum construction and small size this is perfect for traveling.
The ThruNite C2 portable battery charger and power bank is going to be a permanent part of my EDC (Every Day Carry) bag from now on.
More lights visit: http://www.thrunite.com to Get Up to 40% OFF
Amazon US: https://www.amazon.com/dp/B01MG4B6U5
Thanks for watching. Please Subscribe & follow my daily videos.
Troy
http://www.thedoityourselfworld.com
http://www.theoffgridproject.com
Note: Copying this video, in part or in full, is a violation of copyright unless the user has express permission from the owner. Violation of this copyright will be pursued to the fullest extent of the law.
3
views

Starting Pallet Wood Paneling & Spring Flowers
I got a load of pallets and got the idea to make pallet wood paneling in my off grid work shop. Melanie planted flowers around the two houses.
In the morning I picked up a full truck load of wood pallets. These are heat treated pallets so they are safe for use inside. I was waiting to insulate and finish the inside of my work shop/office due to finances. I was going to save up for paneling.
But when I brought this load of pallets home I realized that I have the perfect paneling right here. I can insulate my shop and finish the interior as I get more pallets.
I want to start on one wall first and work from there. At least it will be a start.
I managed to get one board on the wall when my brad nailer quit on me. I was using the Viair portable 12 volt air compressor to power the brad nailer and it was working. On a test board I nailed a piece of pallet wood to a 2x4.
So I got to work. Got 2 brads into the first board and the seal went out on me. This tool was cheap and lasted me through tens of thousands of brads on the tiny house so I guess it served its purpose back then.
I will have to open it up and see if it can be repaired. If not I will replace it.
For now though I used a hammer and nails. But I had to choose softer boards. The hard boards split and bend the nails. Thats why I wanted to use the brad nailer. It goes in fast and easy.
I got one small strip of the first wall done but ran out of time today.
I had been stripping down pallets to get boards for my work. Even the 2x4 nailers are from a large pallet I got for free.
But this all takes time.
I also got a load of leaves for the compost bin today. I had to build another compost bin, giving us three total. These are made out of pallets and are 4 cubic feet.
During the day Melanie was planting more flowers and herbs. She had brought some of our herbs back with us from New York and planted them in the flower beds around the house today.
We got some pansies on clearance because they had some mild frost damage. Melanie was planting these today as well.
She also planted in front of the Chalet today. It is going to be quite beautiful here this year.
Thanks for watching. Please Subscribe & follow my daily videos.
Troy
http://www.thedoityourselfworld.com
http://www.theoffgridproject.com
Note: Copying this video, in part or in full, is a violation of copyright unless the user has express permission from the owner. Violation of this copyright will be pursued to the fullest extent of the law.
64
views
Starting An Apple Orchard At The New Homestead
I was given some apple trees but I had to help dig them out in order to get them. So Melanie and went on a long road trip.
We got three good apple trees and a fourth that may or may not live.
Two of the apple trees seem to be 5 to 9 years old and a third is 3 or 4 years old I think. The fourth tree was in the water and snails had eaten off most of the roots and some of the bark.
I stopped off to get some composted manure on the way home. Each tree gets a full 40 lb bag of manure in the hole.
At home I took a break before planting the trees. It took us about 6 hours round trip to get the trees but this includes digging time.
I also got Melanie some flowers to plant on our new homestead. There are three types of bulbs and she did a great job on planting them around the house and garden area.
I got the trees in the ground in our new orchard. This area will contain our fruit trees. Now we have a good start. The larger trees should bear fruit already this year if the roots take well enough.
The root balls were small and we got nearly the entire root system out of the ground due to a rock bed just a foot below the ground which kept the trees shallow.
I immediately got the electric fence up and running as well in order to protect my new apple orchard from deer. Deer love to nibble on apple tree shoots.
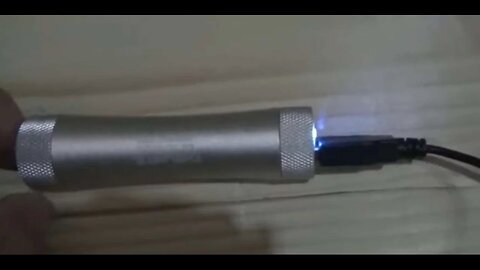
A package arrived in the mail containing a USB soldering iron. This is an interesting device which I never knew existed before. I cant wait to try this out on SMD devices.
Thanks for watching. Please Subscribe & follow my daily videos.
Troy
http://www.thedoityourselfworld.com
http://www.theoffgridproject.com
Note: Copying this video, in part or in full, is a violation of copyright unless the user has express permission from the owner. Violation of this copyright will be pursued to the fullest extent of the law.
29
views