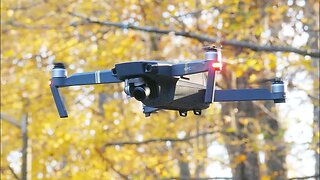
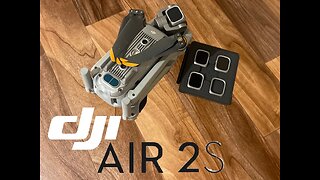
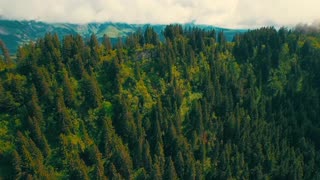
How To Shoot a 4k Daytime Hyperlapse with the Mavic Air 2s In Waypoint mode - ND Filter 512 a MUST!
In today's how to Rumble video I am going to show you how I shoot 4k Daytime Hyperlapse videos with my DJI Mavic Air 2s.
I start off by affixing the darkest ND Filter I can find which for me is currently the ND 512. A very dark filter.
The dark filter reduces the amount of light that makes it to the sensor.
As the light is reduce a slower shutter speed is required. This slower shutter speed allow the movement in the film to show a lot of motion blur. This adds to the overall drama and reality of the Hyperlapse movie in the finished output.
The Air 2s does a noble job of creating the project right inside the drone. However, this does mean a significant reduction in overall quality.
I shoot and store every image in the RAW file format and carry them into Adobes Lightroom Classic. I then batch edit the photos and ultimately use the high resolution RAW files to create the extremely high resolution 4k video final output.
I liken it to using your DSLR camera in all it's glory on Automatic or Program when it's capable of so much more.
Ask a pro...we all shoot everything in Manual...even with our drones. :-)
I hope you find this video to be helpful and educational.
I'll see you in the next one.
I am
Robert Anthony Part 107 Commercial Drone Pilot
I fly a Mavic Air 2s
Please reach out to me on my website
https://raphotog.com
Thanks for dropping by
-
 11:25
11:25
CCxRC
6 years agoDJI Mavic Pro Filming With Sandmarc ND Filters
-
 1:39
1:39
ActionCameraResearch
2 years agoShould you use an ND Filter with your GoPro?
9 -
 5:03
5:03
TwoMatesAndaDog
1 year agoHow to... Air 2s Lens Filter
2 -
 26:32
26:32
Challenge Your Eye
2 years agoShooting Tokyo with a Nikon Z7II and a Variable ND Filter
46 -
 6:06
6:06
JD the DJ
2 years agoManual Exposure Test on Yuneec Typhoon H Drone CGO3+ 4K Camera
37 -
 0:32
0:32
Dronefootage
1 year agoDronevideo 4K View over Woods and Valley
10 -
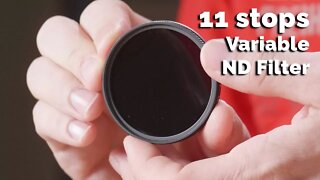 4:57
4:57
Tom Antos
6 years agoCrazy STRONG Variable ND Filter! (11 Stops) PowerXND 2000 from Aurora-Aperture
4 -
![MAVIC AIR SKYREAT ND PL Lens Filters Review - [Unboxing, Installation & FLIGHT TEST]](https://hugh.cdn.rumble.cloud/s/s8/1/_/P/X/O/_PXOk.0kob-small-MAVIC-AIR-SKYREAT-ND-PL-Len.jpg) 10:46
10:46
Technology Reviews. Drones, E-Bikes, Portable Power, RC vehicles, etc.
6 years agoMAVIC AIR SKYREAT ND PL Lens Filters Review - [Unboxing, Installation & FLIGHT TEST]
1 -
 5:29
5:29
Camber Film School
1 year agoHaida Pro ii CPL-VND 2-in-1 Filter Review – CINEMATIC Video w/ Awesome effects in ONE Filter!
21 -
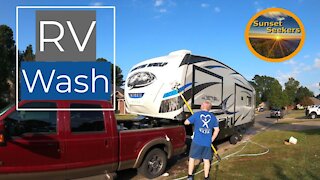 4:14
4:14
Sunset Seekers
3 years ago $0.04 earnedRV Wash | DJI Mavic 2 Pro Intelligent Flight Modes
57